Introduction to Botanical Sketching
-
The allure of nature-inspired art
Nature has always been a source of inspiration for artists. The beauty of plants and flowers captivates us. Their colors, shapes, and patterns are fascinating. Many artists find joy in capturing this beauty on paper.
-
Understanding botanical sketching
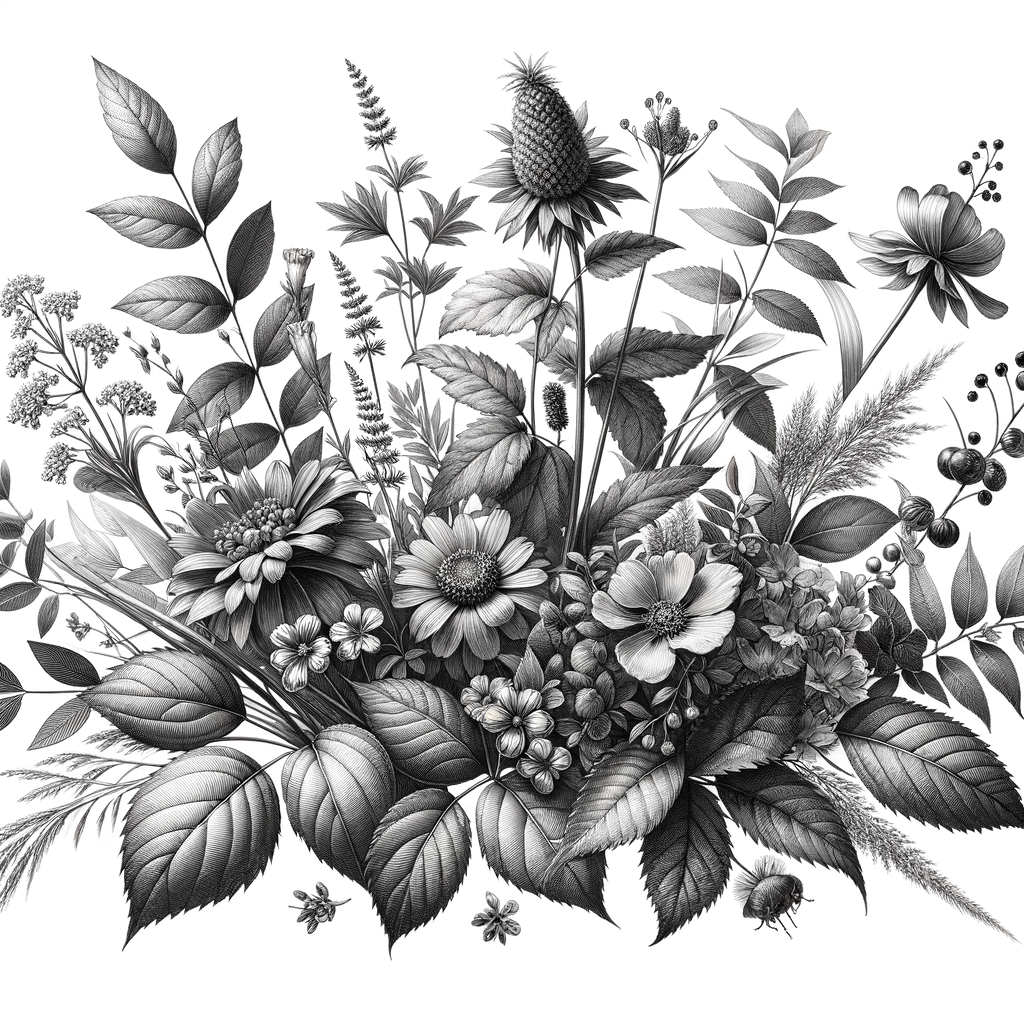
Botanical sketching is the art of drawing plants and flowers. It involves observing details closely. Artists sketch leaves, petals, and stems with care. This type of art helps us appreciate the small wonders of nature.
-
Why sketching plants and flowers is therapeutic
Sketching plants and flowers can be very calming. It allows us to focus on something beautiful. Many people find it relaxing and stress-relieving. Spending time with nature, even through art, can improve our mood and well-being.
Botanical Illustration Techniques
Basic Techniques
Learning basic techniques is the first step to becoming a skilled botanical illustrator. Here are three essential methods:
- Line Drawing
- Shading and Texture
- Adding Color
Line drawing is the foundation of botanical illustration. Start by sketching the outline of the plant. Use light, smooth strokes to capture the shape and details. This technique helps you understand the structure of the plant.
Shading adds depth and dimension to your drawings. Use different pencil pressures to create light and dark areas. Texture can be added by varying your strokes. For example, use short, quick strokes for rough textures and long, smooth strokes for smooth surfaces.
Adding color brings your botanical illustrations to life. Start with light colors and gradually add darker shades. Use colored pencils, watercolors, or markers. Pay attention to the natural colors of the plant to make your illustration realistic.
| Technique | Description |
|---|---|
| Line Drawing | Sketch the outline of the plant with light, smooth strokes. |
| Shading and Texture | Use different pencil pressures and strokes to add depth and texture. |
| Adding Color | Start with light colors and add darker shades for realism. |
Advanced Techniques
-
Drawing Botanical Details
When drawing plants, details matter. Look closely at the leaves, stems, and petals. Notice the veins in the leaves and the texture of the bark. Use a fine pencil to capture these tiny details. This makes your drawing look more real.
Tip: Use a magnifying glass to see small details better.
-
Creating Depth and Perspective
To make your drawing look 3D, add depth and perspective. Draw larger objects in the front and smaller ones in the back. This trick makes your picture look like it has space.
Shading is also important. Light and dark areas show where the light hits and where shadows fall. This helps your drawing look more lifelike.
Technique Effect Size Variation Creates distance Shading Adds depth -
Using Color for Realism
Colors make your drawing pop. Use different shades of green for leaves and various colors for flowers. Look at real plants to see how colors change in light and shadow.
Blending colors smoothly can make your drawing look more natural. Use colored pencils or watercolors for this effect.
“Colors are the smiles of nature.” – Leigh Hunt
Botanical Art Tips
- Start with simple shapes
- Observe carefully
- Practice regularly
- Experiment with different mediums
When you begin drawing plants, start with basic shapes. For example, use circles, ovals, and triangles. This helps you get the overall form right before adding details.
Look closely at the plant you are drawing. Notice the shapes, colors, and textures. Take your time to see how the leaves attach to the stem and how the petals are arranged.
The more you draw, the better you will get. Try to draw a little every day. Even a quick sketch can help you improve. Remember, practice makes perfect!
Don’t just stick to pencils. Try using watercolors, colored pencils, or even markers. Each medium can give your botanical art a different look and feel. Experimenting can also make drawing more fun.
Botanical Drawing Tutorials
Floral Sketching
Floral sketching is a wonderful way to capture the beauty of nature. Here, we will explore how to sketch different types of flowers. Let’s get started!
-
Sketching Roses
Roses are known for their layered petals and elegant shapes. Start by drawing a small circle for the center. Then, add petals around it, making each petal slightly larger as you move outward. Remember, roses have many layers, so take your time to add details.
-
Drawing Daisies
Daisies are simpler to draw. Begin with a circle for the center. Then, draw long, thin petals around the circle. Daisies usually have a lot of petals, so make sure to fill them in evenly. Adding a few leaves can make your sketch more complete.
-
Illustrating Orchids
Orchids have unique shapes and patterns. Start with the center, which often looks like a small cup. Then, draw the large, rounded petals that spread out. Pay attention to the patterns on the petals, as orchids often have beautiful spots and lines.
| Flower | Key Features |
|---|---|
| Roses | Layered petals, elegant shape |
| Daisies | Long, thin petals, simple structure |
| Orchids | Unique shapes, patterned petals |
Sketching Trees and Leaves
-
Drawing Deciduous Trees
Deciduous trees are those that lose their leaves in the fall. To draw these trees, start with the trunk. Use light, short strokes to sketch the bark texture. Then, add branches that spread out. Draw the leaves in clusters, making sure they look natural.
Tip: Observe real trees to see how the branches and leaves are arranged.
-
Sketching Coniferous Trees
Coniferous trees, like pines and firs, have needles instead of leaves. Begin by drawing the trunk. Then, sketch the branches that angle upward. Add the needles in small bunches. Make sure they look dense and layered.
Example: Pine trees have long, thin needles, while fir trees have shorter, softer needles.
-
Illustrating Different Types of Leaves
Leaves come in many shapes and sizes. To illustrate them, start by observing the leaf’s shape. Draw the outline first. Then, add the veins inside the leaf. These veins help show the leaf’s texture and structure.
Fun Fact: Maple leaves have a distinct shape with several points, while oak leaves have a wavy edge.
| Tree Type | Key Features |
|---|---|
| Deciduous | Loses leaves in fall, broad leaves |
| Coniferous | Needles instead of leaves, evergreen |
Botanical Art Supplies
-
Choosing the Right Sketchbook
Picking the right sketchbook is important for botanical art. Look for one with thick, smooth paper. This helps your drawings look clear and bright. A good size is around 9×12 inches. This gives you enough space to draw details.
Tip: Make sure the paper is acid-free. This keeps your art from yellowing over time.
-
Recommended Pencils and Pens
For sketching plants, you need good pencils and pens. Use HB pencils for light sketches and 2B or 4B for darker lines. Pens with fine tips, like Micron pens, are great for details.
Example: A set of Staedtler pencils and Sakura Micron pens can be very useful.
-
Best Paints for Botanical Art
Watercolors are often used in botanical art. They blend well and create beautiful effects. Brands like Winsor & Newton and Sennelier are popular. Choose a set with many colors for more options.
Tip: Try to get artist-grade paints. They have better pigments and last longer.
-
Useful Accessories for Botanical Sketching
There are some extra tools that can help you. A good eraser, like a kneaded eraser, helps you fix mistakes. A ruler is useful for drawing straight lines. A magnifying glass can help you see small details in plants.
Tip: Keep a small bag to carry your supplies when you go outside to sketch.
| Item | Recommended Brand | Key Feature |
|---|---|---|
| Sketchbook | Strathmore | Thick, smooth paper |
| Pencils | Staedtler | Variety of hardness |
| Pens | Sakura Micron | Fine tips |
| Paints | Winsor & Newton | Artist-grade pigments |
| Eraser | Kneaded Eraser | Malleable |
Nature Sketchbook Ideas
-
Creating a Seasonal Sketchbook
One fun idea is to create a seasonal sketchbook. This means you draw what you see in nature during different times of the year. For example, in spring, you can sketch blooming flowers. In summer, you might draw green trees and bright sunshine. Fall could be all about colorful leaves, and winter might feature snowy landscapes. This way, you can see how nature changes throughout the year.
-
Sketching During Nature Walks
Another great idea is to take your sketchbook on nature walks. As you walk, look around and find interesting things to draw. It could be a bird, a tree, or even a small insect. Sketching during walks helps you notice the little details in nature. Plus, it’s a relaxing way to spend time outdoors.
-
Documenting a Plant’s Growth
You can also document a plant’s growth in your sketchbook. Choose a plant and draw it regularly as it grows. Start with a seedling and sketch it every week or month. This will show how the plant changes over time. It’s a great way to learn about plants and improve your drawing skills.
Botanical Art Inspiration
-
Studying the Work of Famous Botanical Artists
One great way to find inspiration is by studying the work of famous botanical artists. These artists have spent years perfecting their craft. For example, Maria Sibylla Merian is known for her detailed illustrations of plants and insects. Her work can teach us a lot about the beauty and complexity of nature.
Another famous artist is Pierre-Joseph Redouté. He is often called the “Raphael of flowers” because of his stunning flower paintings. By looking at his art, you can learn how to capture the delicate details of petals and leaves.
Artist Known For Maria Sibylla Merian Detailed illustrations of plants and insects Pierre-Joseph Redouté Stunning flower paintings -
Finding Inspiration in Your Local Flora
You don’t have to look far to find inspiration. Your local area is full of plants waiting to be sketched. Take a walk in your neighborhood or visit a nearby park. Notice the different shapes, colors, and textures of the plants around you.
For instance, you might find a unique leaf pattern or a brightly colored flower. These small details can make your botanical art special. Remember, every plant has its own story to tell.
“Nature always wears the colors of the spirit.” – Ralph Waldo Emerson
-
Exploring Botanical Art in Different Cultures
Botanical art is not just a Western tradition. Many cultures around the world have their own styles of depicting plants. Exploring these can give you new ideas and techniques.
For example, Japanese botanical art often focuses on simplicity and elegance. The art of Ikebana, or flower arranging, is a good example of this. In contrast, Indian botanical art is known for its vibrant colors and intricate patterns.
Culture Style Japanese Simplicity and elegance Indian Vibrant colors and intricate patterns
Conclusion: The Joy of Botanical Sketching
- Recap of botanical illustration techniques and tips: Throughout this guide, we’ve explored various techniques such as using light pencil strokes, focusing on details, and understanding plant anatomy. Remember to practice shading to give your sketches depth and dimension. Using different tools like fine liners and watercolor can also enhance your artwork.
- Encouragement to continue exploring and practicing: Botanical sketching is a journey. The more you practice, the better you will become. Don’t be afraid to make mistakes; each sketch is a step towards improvement. Keep a sketchbook handy and draw whenever you can. Experiment with different plants and styles to find what you enjoy the most.
- Final thoughts on the beauty of botanical sketching: Botanical sketching allows us to connect with nature in a unique way. It helps us see the intricate details of plants that we might otherwise overlook. Whether you are sketching a simple leaf or a complex flower, each piece of art is a celebration of nature’s beauty. Enjoy the process and let your creativity bloom!


