Introduction: The Art of Drawing Portraits
Welcome to DoodleDive, where we are passionate about all things related to drawing. In this blog post, we will delve into the captivating world of portrait drawing. Portraits are more than just a representation of a person; they are a way for artists to express their perception of the subject’s personality and mood. Whether you are a seasoned artist or a beginner, understanding the art of drawing portraits can significantly enhance your drawing skills.
- Understanding the importance of portrait drawing in art
- Overview of the step-by-step portrait drawing guide
Portrait drawing holds a significant place in the realm of art. It’s not just about capturing someone’s physical appearance; it’s about conveying their essence, their emotions, and their humanity. A well-drawn portrait can tell a story, evoke emotions, and create a lasting impression. According to a study by Art History, portraits have been a crucial part of art since ancient times, showcasing the evolution of art styles and techniques over centuries.
In the following sections, we will provide a comprehensive guide to drawing portraits. We will start with the basics, such as understanding the human face’s structure, and gradually move towards more advanced techniques. By following this guide, you will learn how to capture the unique features and expressions that make each face distinct and memorable. Whether you want to create realistic portraits or stylized ones, this guide will equip you with the necessary skills and knowledge.
So, let’s embark on this exciting journey of portrait drawing. Remember, practice is key in art. So, don’t be disheartened if your initial attempts don’t turn out as expected. With patience, persistence, and the right guidance, you can master the art of drawing portraits.
A Detailed Portrait Drawing Guide for Artists
Mastering the art of portrait drawing requires a deep understanding of various techniques. This guide will help you explore and choose the right technique that matches your artistic style.
Step 1: Understanding the Basics of Portrait Art Techniques
Before you start drawing, it’s essential to understand the basics of portrait art techniques. These techniques will serve as your foundation in creating stunning and realistic portraits.
- Exploring different portrait art techniques
- Choosing the right technique for your artistic style
There are several portrait art techniques that artists use to create their masterpieces. Some of the most popular ones include the Charcoal Technique, the Chiaroscuro Technique, and the Contour Drawing Technique. Each of these techniques has its unique characteristics and effects, which can greatly influence the outcome of your portrait.
Choosing the right technique depends on your personal style and the effect you want to achieve. For instance, if you want your portrait to have a dramatic and intense effect, you might want to consider using the Chiaroscuro Technique. On the other hand, if you prefer a more simple and clean look, the Contour Drawing Technique might be the best choice for you. Remember, the key is to experiment with different techniques until you find the one that best suits your style.
In conclusion, understanding the basics of portrait art techniques is the first step towards creating a stunning portrait. So, take your time to explore different techniques and choose the one that best matches your artistic style.
Step 2: Preparing for the Portrait Drawing
Before you begin your journey into the world of portrait drawing, it’s important to prepare your workspace and gather the right materials. This step is crucial as it sets the foundation for your drawing process.
- Selecting the right materials
- Pencils: A range of pencils from 2H to 6B is ideal for portrait drawing. The harder pencils (2H-2B) are great for initial sketching and lighter shading, while the softer ones (3B-6B) are perfect for deeper shadows and bold lines. Learn more about pencils here.
- Paper: A medium-weight drawing paper with a slight texture is best for portrait drawing. It should be heavy enough to hold the pencil marks without tearing.
- Erasers: A kneaded eraser is excellent for lightening areas and creating highlights, while a regular eraser is useful for removing lines and mistakes.
- Blending tools: These can be a blending stump, a piece of tissue, or even your finger. They help in smoothing out the pencil marks and creating a seamless blend of tones.
- Setting up your workspace
- Lighting: Ensure your workspace is well-lit. Natural light is the best, but if that’s not possible, use a desk lamp with a daylight bulb.
- Space: Make sure you have enough space to spread out your materials. You should be able to move freely without knocking anything over.
- Comfort: Your chair and drawing table should be comfortable. Remember, you might be sitting for long periods while drawing.
- Organization: Keep your materials organized. Having a specific place for each item can save you time and prevent frustration.
Choosing the right materials is essential for creating a quality portrait. Here are some recommended materials for portrait drawing:
Having a well-organized workspace can significantly improve your drawing experience. Here are some tips for setting up your workspace:
With the right materials and a comfortable workspace, you’re now ready to start your portrait drawing. Remember, practice makes perfect, so don’t be discouraged if your first few attempts don’t turn out as you’d hoped. Keep drawing, and you’ll see improvement over time.
Step 3: Starting the Portrait Drawing
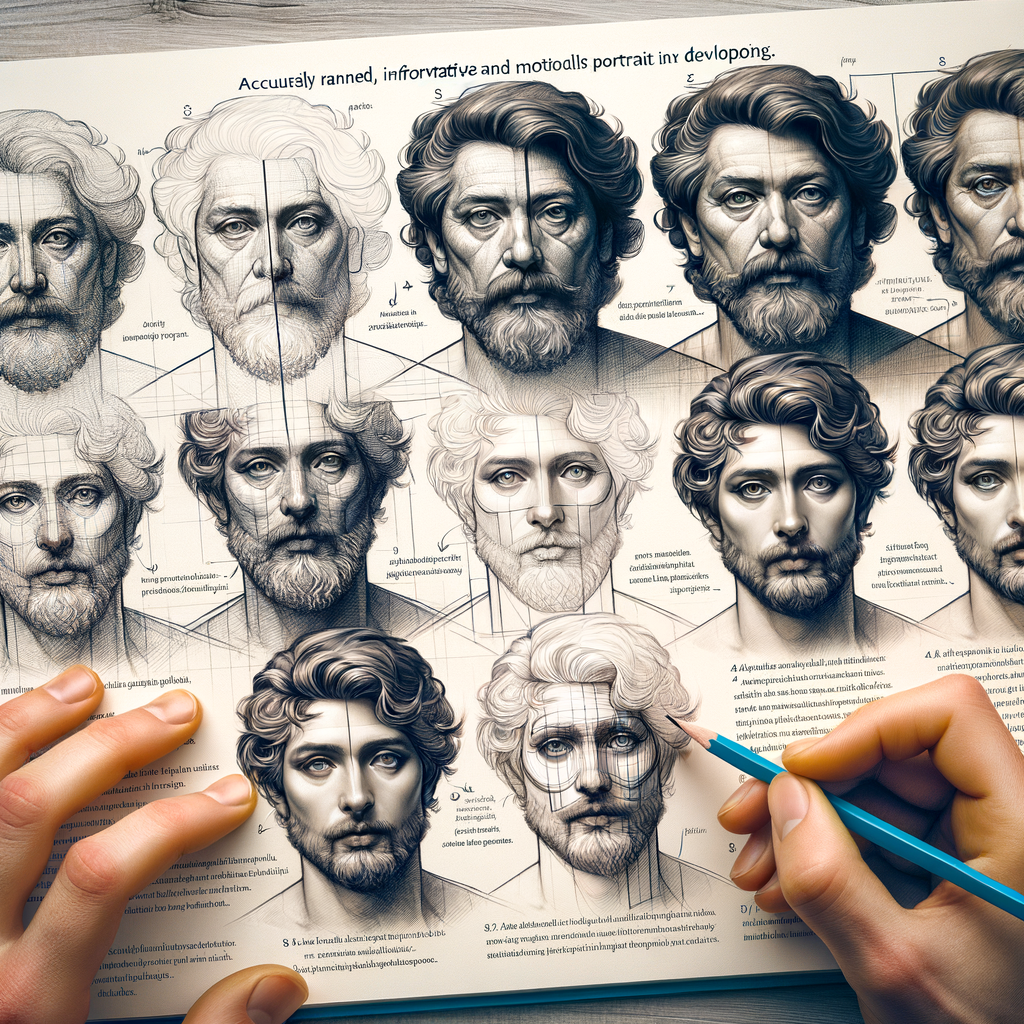
Now that you have understood the basics and prepared your workspace, it’s time to start the actual process of drawing a portrait. This stage involves understanding proportions and creating the initial sketch. Let’s delve into these steps in detail.
- Understanding proportions in portrait drawing
- Creating the initial sketch
Proportions are the key to achieving a realistic portrait. They refer to the relative size and scale of the various parts of the face. For instance, the eyes are generally halfway down the head, not at the top. The bottom of the nose is halfway between the eyes and the chin, and the mouth is halfway between the nose and the chin. Understanding these proportions can help you create a more accurate and lifelike portrait. You can learn more about facial proportions on Wikipedia.
The initial sketch is a rough outline of the portrait. It’s not about details at this stage but about capturing the basic shape and proportions of the face. Start with light, loose strokes and avoid pressing too hard with your pencil. This makes it easier to erase and adjust lines as you refine the sketch. Remember, practice makes perfect. The more you sketch, the better you will become at capturing the likeness of your subject.
These steps might seem challenging at first, but with patience and practice, you will see improvement in your portrait drawing skills. Remember, every artist has their own unique style, so don’t be afraid to experiment and find what works best for you.
Mastering the Art of Portrait Drawing: Advanced Techniques
As we delve deeper into the art of portrait drawing, we now focus on the intricate details and textures that bring a portrait to life. These techniques are what separate a good portrait from a great one. Let’s explore how to add these details and textures to your portrait drawings.
Step 4: Adding Details and Textures
Adding details and textures to your portrait is like adding the finishing touches to a masterpiece. It’s all about capturing the unique characteristics of the subject and making the portrait as realistic as possible. Let’s look at some techniques to help you achieve this.
- Techniques for drawing realistic skin textures
- Adding details to the eyes, nose, and mouth
Drawing realistic skin textures can be a challenging task, but with practice and the right techniques, you can master it. Start by observing the skin closely. Notice the pores, wrinkles, freckles, and other unique features. Use a variety of pencil strokes to mimic these textures. For instance, you can use stippling for freckles, hatching for wrinkles, and cross-hatching for darker areas. Remember, the key is to observe and practice. For more information, you can refer to this Wikipedia article.
The eyes, nose, and mouth are the most expressive parts of the face. Paying attention to the details in these areas can make your portrait more realistic and expressive. For the eyes, focus on the shape, the color of the iris, and the reflections in the pupil. For the nose, observe the shape and the shadows. And for the mouth, pay attention to the shape of the lips, the teeth, and the shadows. Remember, it’s the little details that make a big difference.
In conclusion, adding details and textures to your portrait is an essential step in mastering the art of portrait drawing. It’s all about observation, practice, and patience. So, keep practicing and soon you’ll be creating realistic and expressive portraits.
Step 5: Shading and Highlighting
In this step, we will delve into the world of light and shadow in portrait drawing. This step is crucial as it gives your portrait a three-dimensional look, making it appear more realistic. We will also explore various techniques for effective shading and highlighting.
- Understanding Light and Shadow in Portrait Drawing
- Techniques for Effective Shading and Highlighting
- Hatching: This involves drawing closely spaced parallel lines. The closer the lines, the darker the area appears.
- Cross-hatching: This is similar to hatching but involves drawing another set of lines at an angle to the first set.
- Stippling: This involves creating a series of dots. The closer the dots, the darker the area appears.
- Blending: This involves smoothing out the pencil marks to create a smooth transition between light and dark areas.
Light and shadow play a significant role in portrait drawing. They help in creating depth and volume, making your portrait appear more lifelike. Understanding light and shadow is not as complicated as it seems. The key is to observe how light falls on the subject and how it creates shadows and highlights.
Light areas are the parts of the portrait that are directly hit by light, while shadow areas are those that are blocked from the light. There is also something called ‘reflected light’, which is light bouncing off surrounding surfaces onto the subject. This is often seen in the shadow areas and helps in creating a sense of depth and realism.
For a better understanding of light and shadow in portrait drawing, you can refer to this Wikipedia article.
Shading and highlighting are techniques used to create a sense of depth and volume in your portrait. Here are some techniques you can use:
Remember, the key to effective shading and highlighting is observation and practice. So, keep practicing and experimenting with these techniques.
Art Guide for Portraits: Case Studies and Examples
As we delve into the world of portrait drawing, it’s crucial to learn from real-life examples. Let’s take a look at a case study that focuses on realistic portrait drawing, a style that aims to capture the subject’s likeness as accurately as possible.
Case Study 1: Realistic Portrait Drawing
In this case study, we’ll explore the process of creating a realistic portrait, and highlight the key takeaways that you can apply to your own artwork.
- Exploring the process of creating a realistic portrait
- Key takeaways from the case study
Realistic portrait drawing involves a meticulous process. The artist starts by sketching the basic shape of the face, then gradually adds details such as the eyes, nose, mouth, and hair. The key is to observe the subject closely, paying attention to the subtle nuances of their features and expressions. Shading and highlighting techniques are used to create depth and dimension, making the portrait appear lifelike.
From this case study, we learn that patience and attention to detail are crucial in realistic portrait drawing. It’s not about rushing to complete the artwork, but rather taking the time to capture the subject’s unique characteristics. Understanding the basics of light and shadow is also essential, as it allows the artist to create a three-dimensional effect on a two-dimensional surface. Lastly, practice is key. The more you draw, the better you’ll become at observing and replicating real-life details.
Remember, every artist has their own style and approach when it comes to portrait drawing. What’s important is to keep learning, experimenting, and refining your skills. As the famous artist Vincent Van Gogh once said, “I am always doing what I cannot do yet, in order to learn how to do it.”
Case Study 2: Abstract Portrait Drawing
Abstract portrait drawing is a unique form of art that allows artists to express their creativity and emotions. This case study will delve into the approach to abstract portrait drawing and provide key takeaways.
- Understanding the approach to abstract portrait drawing
- Key takeaways from the case study
- Abstract portraiture is not about accuracy, but about emotion and interpretation.
- Understanding the basics of drawing is essential, but so is the willingness to break the rules.
- Experimentation with shapes, colors, and lines can lead to unique and expressive artworks.
- Studying the works of abstract artists like Picasso can provide valuable insights and inspiration.
Abstract portrait drawing is not about capturing an exact likeness, but rather about expressing the inner essence of the subject. It involves using shapes, colors, and lines in a non-representational or semi-representational way. The artist has the freedom to distort reality for an emotional effect. This approach requires a deep understanding of the basic principles of drawing and a willingness to let go of traditional rules.
For instance, the famous abstract artist Pablo Picasso was known for his unique approach to abstract portraiture. His works, such as ‘Les Demoiselles d’Avignon’, showcase how he used geometric shapes and fragmented forms to create a new visual language.
Abstract portrait drawing is a powerful tool for self-expression and creativity. Here are some key takeaways from this case study:
In conclusion, abstract portrait drawing is a fascinating and liberating form of art. It challenges the artist to think outside the box and express their unique perspective on the world.
Conclusion: Becoming a Master of Portrait Drawing
As we draw this guide to a close, it’s important to remember that the journey to becoming a master of portrait drawing is a continuous one. It requires patience, practice, and a deep understanding of the techniques and principles we’ve discussed.
- Recap of the step-by-step portrait drawing guide
- Continuing your journey in portrait drawing
We started with the basics, understanding the importance of observation and the role it plays in capturing the essence of the subject. We then moved on to the step-by-step guide, starting with the sketching phase, where we learned about the importance of proportions and guidelines. We then explored the detailing phase, where we delved into the intricacies of drawing the eyes, nose, mouth, and ears. Finally, we discussed the shading phase, which brings depth and realism to the portrait.
Remember, becoming a master of portrait drawing doesn’t happen overnight. It’s a journey filled with continuous learning and practice. Don’t be disheartened by initial failures. Instead, use them as stepping stones towards your goal. Experiment with different techniques, styles, and mediums. Keep your curiosity alive and never stop learning. As Leonardo da Vinci once said, “Art is never finished, only abandoned”. So, keep refining your art and continue your journey in portrait drawing.
With the knowledge and techniques you’ve gained from this guide, you’re well on your way to becoming a master of portrait drawing. Remember, the key is to keep practicing and never stop learning. Happy drawing!