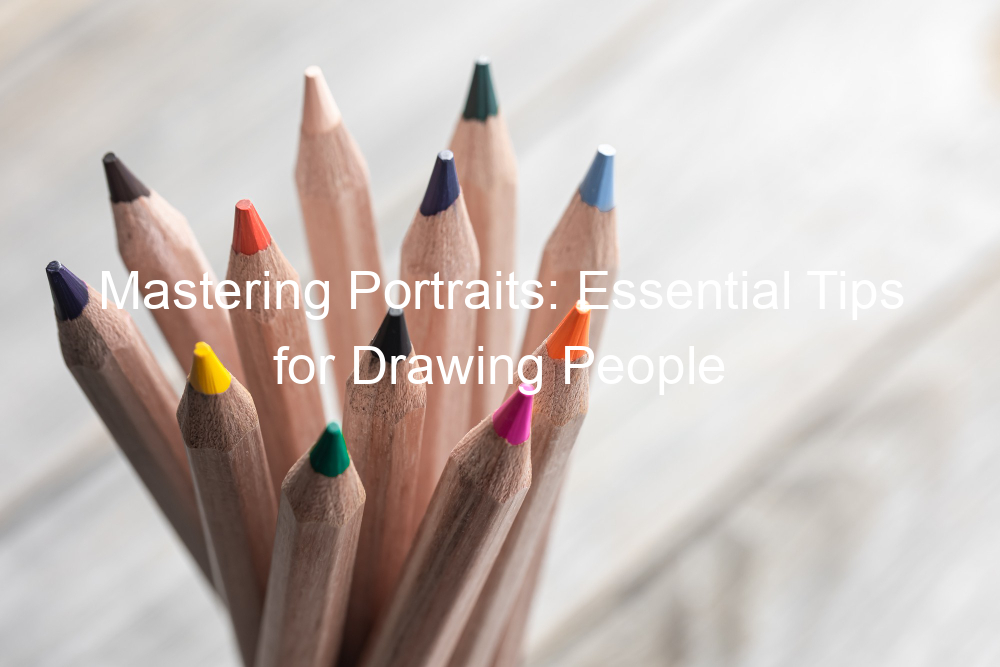
Introduction to Drawing Portraits
Portraits are a wonderful way to capture the essence of a person, their personality, and their unique features. Drawing portraits can be a rewarding experience, but it also comes with its own set of challenges. In this section, we will delve into the importance of drawing portraits and the challenges you might face when sketching people.
-
- Understanding the Importance of Drawing Portraits
Drawing portraits is more than just creating a likeness of a person. It’s a way to express emotions, tell a story, and even capture a moment in time. Portraits can convey a deep sense of understanding and connection between the artist and the subject. It’s a form of communication that goes beyond words.
Moreover, drawing portraits can also help improve your overall drawing skills. It requires a keen eye for detail, understanding of proportions, and mastery of shading techniques. As such, practicing portrait drawing can be a great way to hone your artistic abilities.
-
- Challenges in Sketching People
Sketching people can be a challenging task, especially for beginners. One of the main challenges is capturing the likeness of the person. Every face is unique and has its own set of features that make it distinct. It’s not just about getting the shape of the nose or the eyes right, but also about capturing the expressions and emotions that make the person who they are.
Another challenge is dealing with proportions. The human face has a specific set of proportions and getting them wrong can result in a portrait that looks off. It’s important to understand and apply these proportions correctly to create a realistic portrait.
In the following sections, we will dive deeper into the essential techniques for drawing portraits, provide artistic tips, and guide you through the process step-by-step. Remember, practice makes perfect, so don’t be discouraged if your first few attempts don’t turn out as you’d like. Keep practicing and you’ll see improvement over time.
Essential Drawing Techniques for Portraits
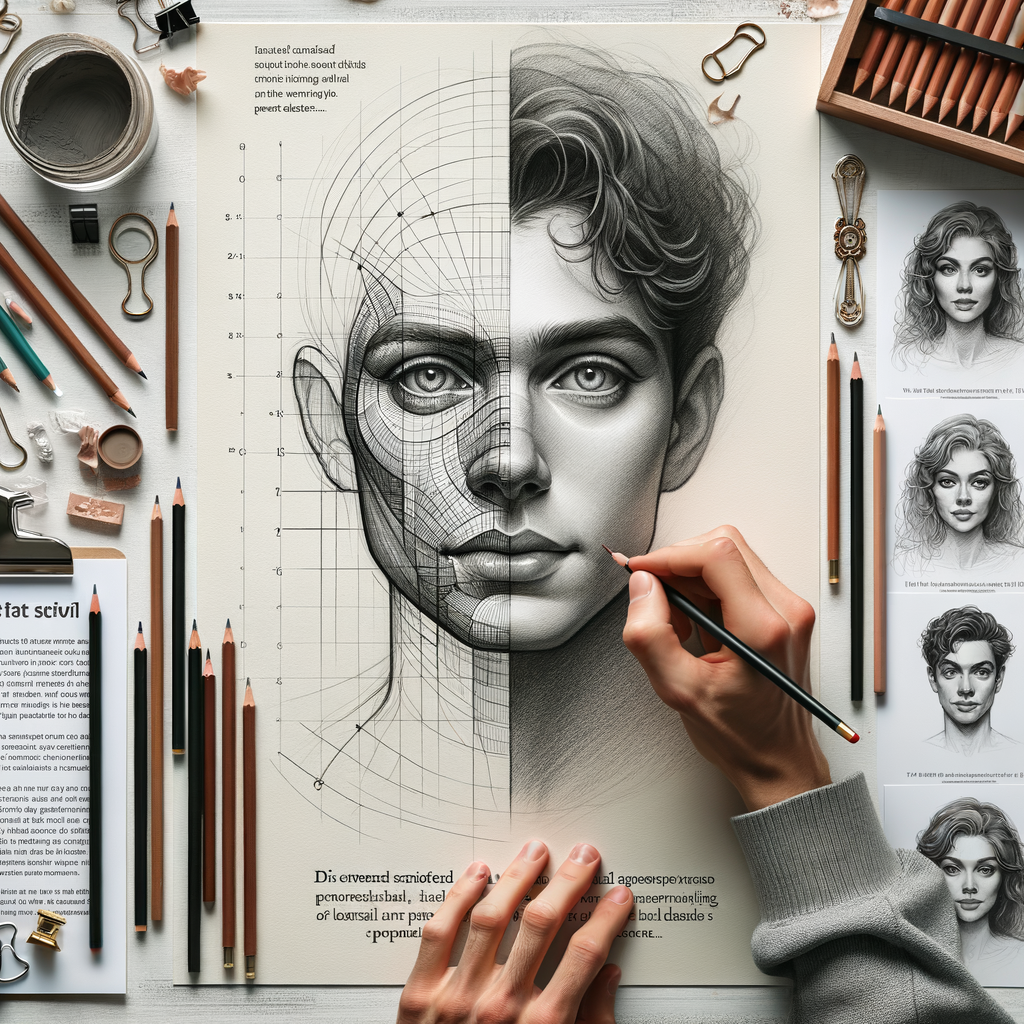
Mastering portrait drawing requires a deep understanding of various techniques. One of the most crucial aspects to consider is the understanding of proportions.
Understanding Proportions
Proportions play a significant role in drawing portraits. They are the foundation of creating a realistic representation of a human face. Let’s delve into the importance of proportions and common mistakes made while drawing them.
-
- Importance of proportions in drawing human faces
Proportions are the measurements or sizes of different parts of the face in relation to each other. They help to maintain the balance and symmetry of the face. For instance, the distance between the eyes, the length of the nose, the width of the mouth, all these are determined by proportions. If these proportions are not accurate, the face may look distorted or unrealistic.
-
- Common mistakes in drawing proportions
Many beginners make the mistake of drawing the eyes too big or the nose too small. Another common error is placing the features in the wrong position. For example, the eyes are often drawn too high on the forehead or the mouth too close to the nose. These mistakes can drastically affect the overall look of the portrait. It’s crucial to practice and understand the basic proportions of the human face to avoid these errors.
Remember, drawing is a skill that improves with practice. So, keep practicing and don’t get disheartened by mistakes. They are a part of the learning process. In the next section, we will discuss another essential technique for portrait drawing – mastering shading.
Mastering Shading
Shading is a powerful tool in the artist’s kit. It can transform a flat, two-dimensional image into a lifelike portrait that seems to leap off the page. Let’s delve into the role of shading in realistic portrait drawing and explore some techniques for effective shading.
- Role of Shading in Realistic Portrait Drawing
Shading is the technique that artists use to add light and shadow to their drawings. It’s what gives a drawing depth and makes it look three-dimensional. When you’re drawing a portrait, shading can help you create the illusion of volume and shape. It can make a nose look round, a cheek look full, and an eye look deep and expressive.
Imagine you’re drawing a face. Without shading, the face would look flat and lifeless. But with shading, you can make the face look real. You can show the curve of the cheek, the roundness of the forehead, and the depth of the eyes. Shading can make a drawing look like a real person.
- Techniques for Effective Shading
There are many techniques for shading, but here are a few that are particularly effective for drawing portraits:
| Technique | Description |
|---|---|
| Hatching | This technique involves drawing closely spaced parallel lines. The closer the lines, the darker the shading. |
| Cross-hatching | This is similar to hatching, but you draw another set of lines at an angle to the first set. This creates a denser, darker shading. |
| Stippling | This technique involves drawing tiny dots. The closer the dots, the darker the shading. |
| Blending | This technique involves smoothing out the pencil marks to create a smooth, even tone. |
Remember, the key to effective shading is practice. The more you practice, the better you’ll get at controlling the pressure of your pencil and creating the tones you want. So grab your sketchbook and start shading!
Artistic Tips for Portraits
Creating beautiful and realistic portraits requires not just talent, but also the right materials. The choice of materials can significantly affect the outcome of your artwork. In this section, we’ll discuss the importance of selecting the right pencils and paper for drawing portraits.
Choosing the Right Materials
Choosing the right materials is a crucial step in creating a successful portrait. The quality and type of materials you use can greatly influence the final result of your artwork. Let’s delve into the specifics.
-
- Selection of Pencils for Drawing People
Pencils are the primary tool for drawing portraits. They come in a variety of types and hardness levels, each offering a unique effect. For instance, ‘B’ pencils are soft and produce darker lines, making them ideal for shading and creating depth. On the other hand, ‘H’ pencils are hard and give lighter lines, perfect for sketching and detailing. A good set of drawing pencils usually includes a range of ‘B’ and ‘H’ pencils.
-
- Choosing the Right Paper
The type of paper you choose can also impact the quality of your portrait. For pencil drawings, it’s best to use a medium-texture paper. This type of paper has enough tooth to hold the pencil lead, but it’s not so rough that it creates unwanted texture in your drawing. Heavier weight paper, such as Bristol board, is also a good choice as it can withstand erasing and reworking without tearing.
Remember, the right materials can make a significant difference in your portrait drawing. It’s worth investing in high-quality pencils and paper to achieve the best results. The next time you sit down to draw, keep these tips in mind and see the difference they make in your artwork.
Developing Your Own Style
Developing your own style in portrait drawing is a journey of self-discovery and creativity. It’s about finding what resonates with you and expressing that through your art. Let’s explore how you can develop your unique style.
-
Experimenting with Different Styles
Experimentation is the key to developing your own style. Don’t be afraid to try different techniques, materials, and styles. Start by copying the styles of artists you admire. This will help you understand their techniques and why they work. Then, mix and match these techniques to create something that’s uniquely yours.
Remember, there’s no right or wrong in art. What matters is that you’re expressing yourself and enjoying the process. So, keep experimenting until you find a style that feels right for you.
-
Case Study: Famous Portrait Artists and Their Styles
Let’s take a look at some famous portrait artists and their unique styles:
Artist Style Leonardo da Vinci Leonardo’s portraits are known for their realism and attention to detail. He used light and shadow to create depth and realism. Pablo Picasso Picasso’s portrait style evolved over his career. In his Blue Period, he used monochromatic blues and greens. In his Cubist period, he deconstructed his subjects into geometric shapes. Andy Warhol Warhol’s portraits are bold and colorful. He used screen printing to create repetitive, graphic images. These artists all had different styles, but they all started by learning the basics and experimenting. So, don’t be afraid to try different things and make mistakes. That’s how you’ll find your own style.
Guide to Drawing Portraits Step-by-Step
Creating a portrait is a journey, not a destination. It’s about capturing the essence of a person, their personality, and their unique features. This guide will walk you through the process step-by-step, starting with sketching the basic shape.
Step 1: Sketching the Basic Shape
Before you start adding details, it’s important to get the basic shape of the face right. This is the foundation of your portrait, and it needs to be strong.
Start by drawing an oval shape. This will be the outline of the face. You can use a light pencil to sketch this, as you’ll be erasing and refining it later. The width of the oval should be about two-thirds of its height. This is a common proportion in most faces.
Next, draw a vertical line down the middle of the oval. This will help you keep your features symmetrical. Then, draw a horizontal line halfway down the oval. This will be the guideline for the eyes.
Finally, draw another horizontal line halfway between the eye line and the bottom of the oval. This will be the guideline for the nose. And one more line halfway between the nose line and the bottom of the oval for the mouth.
| Step | Action |
|---|---|
| 1 | Draw an oval shape for the face outline |
| 2 | Draw a vertical line down the middle of the oval |
| 3 | Draw a horizontal line halfway down the oval for the eyes |
| 4 | Draw another horizontal line for the nose |
| 5 | Draw one more line for the mouth |
Remember, this is just a guide. Every face is unique, and the proportions can vary. The important thing is to keep practicing and adjusting until you’re happy with your sketch.
Step 2: Adding Details to the Face
Now that we have our basic shape, it’s time to add some details to the face. This is where your portrait will start to come alive. Let’s break it down into smaller steps to make it easier.
Eyes
The eyes are often said to be the windows to the soul, and in a portrait, they can be the most expressive part. Start by drawing two almond shapes where the eyes should be. The space between the eyes should be about the same width as one of the eyes. Add circles for the irises and smaller circles for the pupils. Don’t forget to add a small white circle in the pupil for the light reflection!
Nose
The nose can be a bit tricky, but remember, it’s all about observing and practicing. Start by drawing a line down from the inner corner of each eye. This will be the width of the nose. Then, draw a small curved line for the tip of the nose and two smaller curved lines for the nostrils.
Mouth
For the mouth, start by drawing a line that’s about as long as the space between the middle of the eyes. This will be the width of the mouth. Then, draw a curved line for the upper lip and a larger curved line for the lower lip. Add a line in the middle for the opening of the mouth.
Ears
The top of the ears usually align with the eyes, and the bottom aligns with the nose. Draw two C-shaped curves for the outer part of the ears, and add some lines inside for the inner details.
Adding Details Table
| Feature | Description |
|---|---|
| Eyes | Two almond shapes with circles for the irises and pupils. Add a small white circle for light reflection. |
| Nose | Draw a line from the inner corner of each eye for the width. Add a small curved line for the tip and two smaller ones for the nostrils. |
| Mouth | Draw a line as long as the space between the middle of the eyes for the width. Add a curved line for the upper lip and a larger one for the lower lip. Add a line in the middle for the opening. |
| Ears | Draw two C-shaped curves for the outer part of the ears. Add some lines inside for the inner details. |
Remember, practice makes perfect. Don’t be discouraged if your first few attempts don’t look exactly as you want them to. Keep trying, and you’ll get better with each drawing.
Step 3: Refining and Shading
Now that we have our basic sketch and facial details in place, it’s time to move on to the third step of our portrait drawing guide: refining and shading. This step will add depth and realism to our portrait, making it come alive on the page.
Refining involves smoothing out the lines and shapes we’ve drawn so far. It’s like polishing a rough stone into a shiny gem. Shading, on the other hand, is about adding light and shadow to our drawing. It helps to create a three-dimensional effect on a flat piece of paper.
Refining Your Drawing
Start by looking at your drawing with a critical eye. Are there any lines that seem too harsh or shapes that don’t quite look right? Use your eraser to gently correct these areas. Remember, it’s okay to make mistakes. That’s how we learn and improve!
Next, use your pencil to smooth out the lines. This can be done by lightly going over the lines with your pencil, making them softer and more natural-looking.
Shading Your Drawing
Shading is a bit more complex than refining, but don’t worry, you can do it! Here’s a simple way to start:
- Imagine a light source. Where is it coming from? The direction of the light will determine where the shadows in your drawing will be.
- Start shading the areas that are furthest from the light source. These areas will be the darkest.
- Gradually lighten your shading as you move closer to the light source. The areas closest to the light will be the lightest.
Remember, practice makes perfect. The more you refine and shade, the better your portraits will become. So keep drawing, keep learning, and most importantly, keep having fun!
| Key Points |
|---|
| Refining is about smoothing out lines and shapes. |
| Shading adds depth and realism to your drawing. |
| Imagine a light source to guide your shading. |
| Practice is essential for improving your refining and shading skills. |
Tips for Sketching Faces
Sketching faces can be a challenging task, especially for beginners. However, with the right tips and practice, you can master this art. Here, we will cover two main aspects: how to draw the eyes, nose, and mouth, and how to add expression to the face.
-
How to Draw Eyes, Nose, and Mouth
These are the most prominent features of a face and getting them right is crucial for a realistic sketch.
Eyes: Start by drawing the shape of the eye. It’s like a football shape but slightly pointed at both ends. Add the iris and pupil, and remember to leave a small white spot for the reflection. The eyelashes can be added at the end.
Nose: The nose can be simplified into three circles for the nostrils and the tip. Connect these circles with lines to form the bridge and the sides of the nose.
Mouth: The mouth is essentially a line with a slight curve. Add the shape of the lips around this line. The upper lip is usually a bit darker than the lower one because of the light source.
-
Adding Expression to the Face
Expressions bring life to your sketches. They convey the emotions and mood of the person you are sketching.
Smile: A smile can be shown by curving the mouth line upwards and adding creases at the corners of the eyes and mouth.
Frown: For a frown, curve the mouth line downwards and add lines between the eyebrows.
Surprise: To show surprise, draw the eyes wide open with raised eyebrows. The mouth can be open or closed, depending on the intensity of the surprise.
Remember, practice is key in mastering the art of sketching faces. Don’t be discouraged if your first few attempts don’t turn out as expected. Keep trying, and you will see improvement over time.
Conclusion: Practice Makes Perfect
In the journey of portrait drawing, one thing stands out as the key to success: practice. Just like any other skill, portrait drawing requires consistent effort and dedication. Let’s delve into the importance of regular practice and the need for continuous learning and improvement.
-
- Importance of regular practice in mastering portrait drawing
Regular practice is the backbone of mastering portrait drawing. It’s like exercising a muscle; the more you use it, the stronger it gets. Every stroke you make, every face you sketch, adds to your experience and skill. According to a study, it takes about 10,000 hours of practice to become an expert in any field. So, every hour you spend sketching brings you one step closer to becoming a master portrait artist.
-
- Encouragement for continuous learning and improvement
Continuous learning and improvement are equally important. The world of art is ever-evolving, and there’s always something new to learn. Remember, every artist was once a beginner. It’s okay to make mistakes; what’s important is to learn from them. As the famous artist Vincent Van Gogh once said, “I am always doing what I cannot do yet, in order to learn how to do it.” So, keep learning, keep improving, and keep drawing.
As we conclude, remember that the journey to mastering portrait drawing is a marathon, not a sprint. It takes time, patience, and a lot of practice. But with each stroke of your pencil, you’re not just creating art, you’re also creating a better artist in yourself. So, keep practicing, keep learning, and keep drawing. Because in the end, practice makes perfect.