Introduction to Sketching Human Figures
Sketching human figures is a fundamental skill in the world of art, and it’s a fascinating journey of discovery and creativity. This skill is not just about drawing; it’s about understanding and appreciating the human form in all its complexity and beauty.
-
- The importance of understanding human form in art
Understanding the human form is crucial in art. It’s the foundation of figure drawing and painting. By understanding the human form, artists can accurately depict people in various poses, movements, and expressions. It’s not just about the physical appearance, but also about capturing the essence of the human spirit.
-
- Challenges in drawing human figures
Drawing human figures can be challenging. It requires a keen eye for detail, a solid understanding of anatomy, and a good sense of proportion and perspective. The human body is complex, with its curves, muscles, and bones. It’s a challenge to capture this complexity accurately and artistically on paper.
-
- Overview of the article
In this article, we will delve into the world of sketching human figures. We will start by understanding human anatomy for sketching, followed by the art of capturing movement in sketches. We will then explore various sketching techniques for the human form. We will also look at some case studies of artistic representation of human movement. Finally, we will conclude with mastering the art of sketching human movement and gesture.
Whether you’re a beginner or a seasoned artist, this article will provide valuable insights and tips on sketching human figures. So, let’s embark on this exciting journey together!
Understanding Human Anatomy for Sketching
To sketch the human figure accurately, it’s essential to understand basic human anatomy. This knowledge will help you capture the human form with more precision and realism. Let’s dive into the basics of human anatomy sketching.
Basic Human Anatomy Sketching
When starting with human anatomy sketching, there are three fundamental steps you should follow: understanding proportions, sketching basic shapes, and adding details to the sketch.
-
- Understanding proportions
Proportions are crucial in human anatomy sketching. The human body follows certain proportion guidelines. For instance, an adult’s body is generally eight heads tall. Understanding these proportions can help you sketch more accurately and realistically.
-
- Sketching basic shapes
Once you understand the proportions, start by sketching basic shapes. The human body can be broken down into simple shapes like circles, rectangles, and triangles. For example, the torso can be represented as a rectangle, while the head can be a circle. This technique simplifies the complex human form, making it easier to sketch.
-
- Adding details to the sketch
After sketching the basic shapes, you can start adding details. This could include facial features, fingers, toes, and clothing. Remember, the goal is not to capture every single detail but to convey the overall form and movement of the human body.
Understanding human anatomy for sketching is a skill that takes time and practice. But with patience and persistence, you can master this art and create beautiful, realistic sketches of the human form.
Advanced Human Anatomy Sketching
As we dive deeper into the world of human anatomy sketching, we’ll explore more complex concepts. These include understanding muscle structure, adding depth and volume, and rendering texture and skin. These advanced techniques will help you create more realistic and detailed sketches.
- Understanding Muscle Structure
Our bodies are made up of hundreds of muscles, each with its own unique shape and function. When sketching the human form, it’s important to understand how these muscles work together to create movement. For example, when a person lifts their arm, several muscles in the shoulder and upper arm are engaged. By studying muscle structure, you can accurately depict these movements in your sketches.
- Adding Depth and Volume
Adding depth and volume to your sketches can make them appear more three-dimensional. This involves using shading and perspective techniques. For instance, objects closer to the viewer should appear larger, while those further away should be smaller. Similarly, parts of the body that are more prominent, like the nose or the muscles on an arm, should be shaded darker to indicate depth.
- Rendering Texture and Skin
The human skin is not smooth; it has texture. It’s filled with tiny details like pores, wrinkles, and hair. When sketching, these details can add a lot of realism to your work. You can use different pencil strokes to mimic these textures. For example, short, quick strokes can be used to depict hair, while soft, circular motions can be used for skin.
| Technique | Description |
|---|---|
| Muscle Structure | Understanding how muscles work together to create movement. |
| Depth and Volume | Using shading and perspective to make sketches appear three-dimensional. |
| Texture and Skin | Adding details like pores, wrinkles, and hair to mimic the texture of human skin. |
Mastering these advanced sketching techniques will take time and practice, but the results will be worth it. Remember, the key to great art is observation. So, keep studying the human form, keep practicing, and keep refining your skills.
Art of Capturing Movement in Sketches
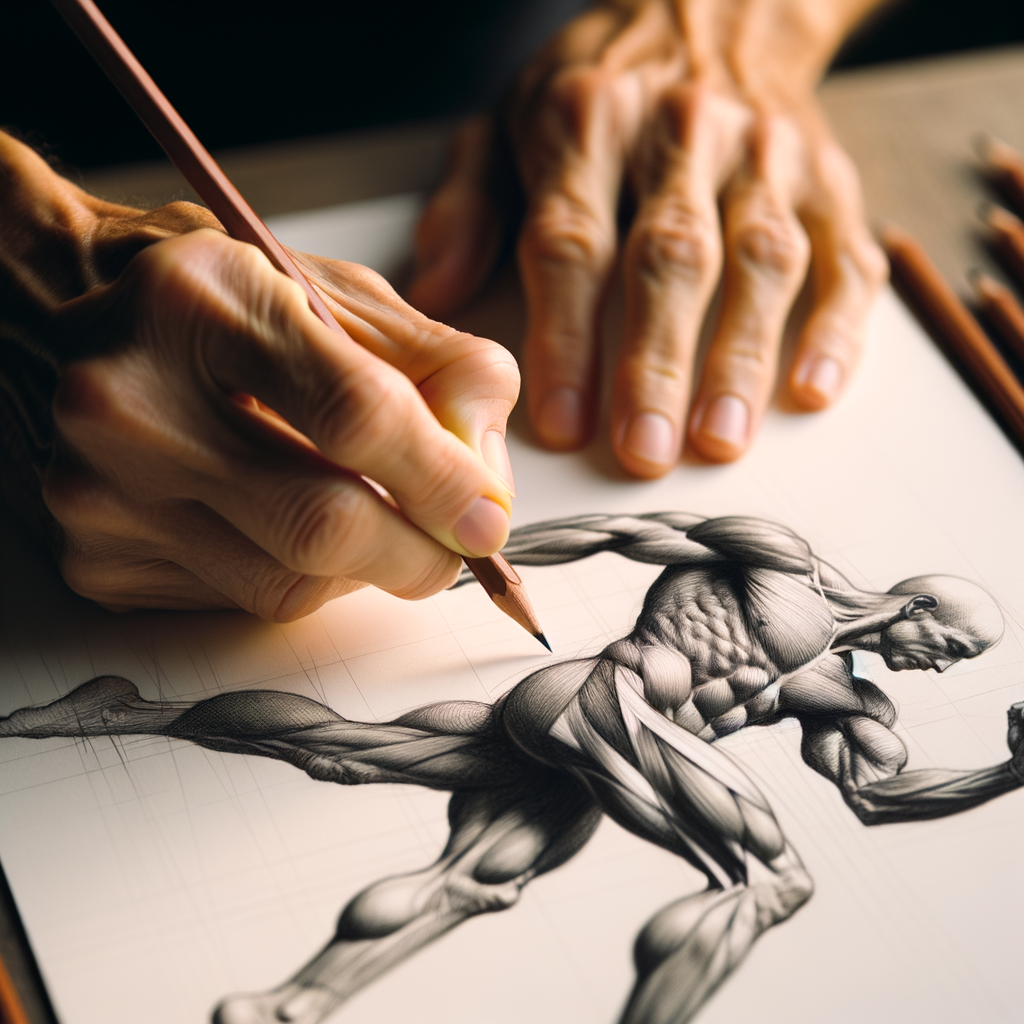
Sketching is a powerful tool for artists to express their creativity. One of the most challenging yet rewarding aspects of sketching is the ability to capture movement. This article will introduce you to the basics of gesture drawing, a technique that allows artists to depict motion in their sketches.
Basics of Gesture Drawing
Gesture drawing is a fundamental skill for artists who want to portray the human form in motion. It involves quick, loose sketches that capture the essence of the subject’s movement. Let’s delve into the basics of gesture drawing.
-
- Understanding the concept of gesture drawing
Gesture drawing is all about capturing the action, emotion, and movement of a subject. Instead of focusing on details, artists use gesture drawing to express the energy and motion of their subject. It’s like telling a story with your sketch, where the movement is the main character.
-
- Techniques for capturing movement
There are several techniques artists use to capture movement in their sketches. One common method is to use quick, flowing lines to represent the direction of the movement. Another technique is to exaggerate the movement to make it more noticeable in the sketch. Remember, the goal is not to create a detailed, realistic drawing, but to capture the essence of the movement.
-
- Practicing gesture drawing
Like any other skill, the key to mastering gesture drawing is practice. Start by observing people in motion – it could be a dancer, an athlete, or even a pedestrian walking down the street. Try to capture their movement in quick, loose sketches. Don’t worry about the details; focus on the movement. With time and practice, your ability to capture movement in your sketches will improve.
Gesture drawing is a powerful tool for artists to capture movement in their sketches. It requires practice and a keen eye for observing movement. So grab your sketchbook and start practicing!
Advanced Gesture Drawing Techniques
Once you’ve mastered the basics of gesture drawing, it’s time to delve deeper into the art of capturing human movement in sketches. Here, we will explore some advanced techniques that will help you bring your drawings to life.
-
- Using Lines of Action
Lines of action are imaginary lines that run through a figure, representing the direction of their movement. They help in creating dynamic and fluid sketches. For instance, a dancer leaping in the air might have a curved line of action, showing the arc of their jump.
-
- Expressing Weight and Balance
Understanding how to express weight and balance in your sketches is crucial. It adds a sense of realism to your drawings. For example, if a person is leaning to one side, their weight will shift towards that side. This can be depicted by emphasizing the leg on that side and showing the other leg relaxed.
-
- Understanding Rhythm and Flow in Human Movement
Rhythm and flow refer to the natural movement and grace of the human body. It’s about capturing the way different parts of the body move in relation to each other. For instance, when a person runs, their arms and legs move in a coordinated, rhythmic manner. Observing and understanding this rhythm can help you create more realistic and dynamic sketches.
These advanced techniques can significantly enhance your gesture drawing skills. Remember, practice is key. The more you sketch, the better you’ll understand the nuances of human movement and be able to capture it in your art.
| Technique | Description |
|---|---|
| Lines of Action | Imaginary lines that represent the direction of a figure’s movement. |
| Expressing Weight and Balance | Depicting how a figure’s weight is distributed, based on their posture and movement. |
| Rhythm and Flow | Understanding the coordinated movement of different body parts. |
Sketching Techniques for Human Form
When it comes to sketching the human form, one of the most important techniques to master is the use of light and shadow. This can make your drawings more realistic and give them depth and volume. Let’s explore how to do this.
Using Light and Shadow
Light and shadow play a crucial role in sketching the human form. They help to create a sense of depth, volume, and realism in your sketches. Here are some key steps to follow:
-
- Understanding light source
The first step in using light and shadow effectively is to understand the light source. The direction from which the light is coming will determine where the shadows and highlights will be on your sketch. Imagine a light bulb shining on your subject from a particular direction. The areas of the subject that are directly facing the light source will be the brightest, while those facing away will be in shadow.
-
- Adding shadows and highlights
Once you’ve determined your light source, you can start adding shadows and highlights to your sketch. Shadows are the dark areas on the form that are away from the light source. Highlights, on the other hand, are the bright areas on the form that are directly facing the light source. By adding these elements, you can create a sense of depth and three-dimensionality in your sketches.
-
- Creating depth and volume with shading
Shading is the technique of varying the lightness and darkness in your sketch to create the illusion of depth and volume. By carefully observing your subject and accurately depicting the way light falls on it, you can create a sense of three-dimensionality. Remember, the areas of the form that are closer to the light source will be lighter, and those farther away will be darker. This contrast between light and dark is what creates the illusion of depth and volume.
Mastering the use of light and shadow in sketching the human form can take some practice, but the results are well worth the effort. With these techniques, you can create sketches that are realistic, dynamic, and full of life.
Creating Texture and Detail
Creating texture and detail in your sketches is like adding the finishing touches to a masterpiece. It’s all about capturing the intricate details that make your subject unique. Let’s explore some techniques to help you achieve this.
-
- Techniques for Sketching Skin Texture
Sketching skin texture can be challenging, but with the right techniques, you can create a realistic representation. Start by observing your subject closely. Look for patterns and variations in the skin. Use a combination of fine lines, dots, and cross-hatching to mimic these patterns. Remember, the key is subtlety. You don’t want to overdo it and make the skin look too rough or textured.
-
- Adding Details to the Face and Body
Adding details to the face and body can bring your sketches to life. For the face, focus on the eyes, nose, and mouth. These are the most expressive parts and can convey a lot of emotion. Use light and shadow to create depth and dimension. For the body, pay attention to the muscles and bones. Use lines to suggest the shape and structure of the body. Remember, it’s not about drawing every single detail, but about capturing the essence of the subject.
-
- Understanding the Use of Negative Space
Negative space is the area around and between the subject of your sketch. It’s just as important as the subject itself. By paying attention to negative space, you can create a more balanced and harmonious composition. It can also help you see shapes and proportions more clearly. Try to see the negative space as shapes, and sketch these shapes instead of focusing solely on the subject. This can help you achieve a more accurate and realistic sketch.
Creating texture and detail in your sketches requires careful observation, a good understanding of your subject, and the right techniques. With practice, you can improve your skills and create more realistic and expressive sketches.
Case Studies: Artistic Representation of Human Movement
Art has always been a way to capture the world around us. One of the most challenging aspects to depict is human movement. Let’s explore some famous artworks that have done this successfully and see what techniques we can learn from them.
-
Study of Famous Artworks Featuring Human Movement
Many artists have brilliantly captured human movement in their work. For instance, Edgar Degas, a French artist, was known for his paintings of ballet dancers. His painting, ‘The Dance Class’ (1874), shows a group of dancers in various stages of movement. Another example is ‘The Starry Night’ (1889) by Vincent Van Gogh. Though not a direct representation of human movement, the swirling patterns in the painting suggest motion and energy.
-
Analysis of Techniques Used
These artists used different techniques to depict movement. Degas often sketched his subjects in motion, using loose strokes to suggest movement. Van Gogh, on the other hand, used thick, swirling brushstrokes to create a sense of motion in his paintings. Both artists used color and light effectively to enhance the sense of movement in their works.
Artist Technique Edgar Degas Loose strokes, sketching in motion Vincent Van Gogh Thick, swirling brushstrokes -
Applying These Techniques in Your Own Work
Now that we’ve studied these artists, it’s time to apply what we’ve learned to our own work. Try sketching subjects in motion, using loose strokes like Degas. Or, experiment with thick, swirling brushstrokes like Van Gogh. Remember, the key is to capture the energy and movement of your subject, not just their physical appearance.
By studying the work of artists who have successfully captured human movement, we can learn valuable techniques to apply in our own artwork. So, grab your sketchbook, and let’s get moving!
Conclusion: Mastering the Art of Sketching Human Movement & Gesture
As we reach the end of our journey, it’s important to reflect on what we’ve learned and how we can apply it to our own artistic endeavors. Sketching human movement and gesture is a complex and rewarding skill, one that requires patience, practice, and a keen eye for detail.
-
- Recap of key takeaways:
Throughout this article, we’ve covered a range of topics, from understanding human anatomy to various sketching techniques. We’ve learned that capturing movement in sketches is about more than just drawing a figure; it’s about conveying a sense of life and dynamism. We’ve also seen how different artists represent human movement in their work, providing us with inspiration and a variety of approaches to consider.
-
- Importance of continuous practice:
Like any art form, sketching human movement and gesture requires continuous practice. It’s not enough to understand the theory; we must apply it, make mistakes, learn from them, and gradually improve. Remember, every artist was once a beginner. Don’t be discouraged by initial difficulties. Instead, view them as stepping stones on your path to mastery.
-
- Encouragement for personal style development:
Finally, while it’s important to learn from others, don’t forget to develop your own style. Your sketches are a reflection of your unique perspective. Don’t be afraid to experiment and let your personality shine through your work. As the famous artist Pablo Picasso once said, “Learn the rules like a pro, so you can break them like an artist.”
Keep practicing, stay curious, and above all, enjoy the process. Happy sketching!


