Introduction to Texture Sketching
Texture sketching is an essential aspect of drawing that every artist should master. It brings life to your artwork, making it more realistic and appealing. In this section, we will delve into the importance of texture in art sketching and explore various sketching techniques that artists can utilize.
-
Understanding the Importance of Texture in Art Sketching
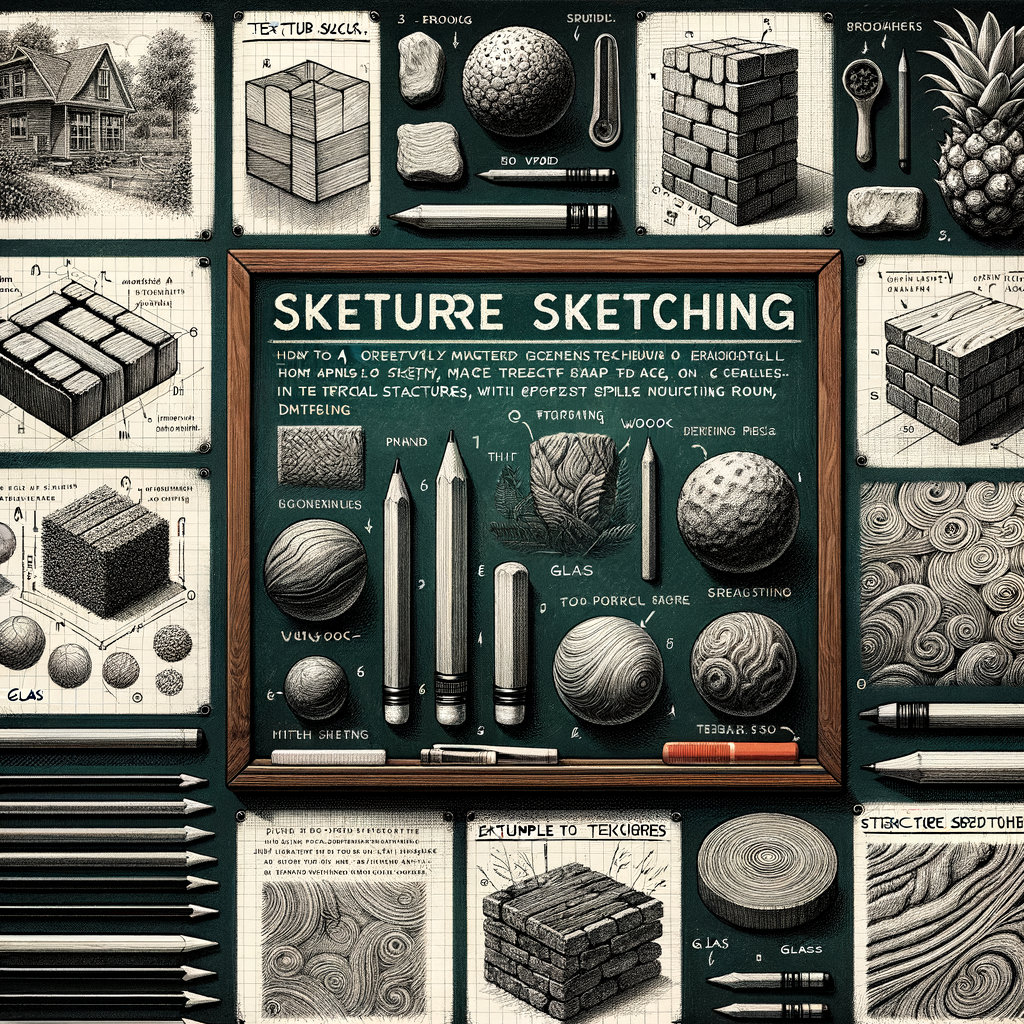
Texture in art sketching is what gives a drawing its unique feel and depth. It’s the difference between a flat, two-dimensional sketch and a vibrant, three-dimensional piece of art. Texture can depict the surface quality of an object, whether it’s rough, smooth, soft, hard, glossy, or matte. It adds a level of realism to your drawings that can’t be achieved with line and shape alone.
For instance, imagine drawing a tree. Without texture, it might just look like a brown and green shape. But with texture, you can show the roughness of the bark, the fluffiness of the leaves, and the graininess of the ground. This level of detail can make your drawing more engaging and visually appealing.
-
Exploring Different Sketching Techniques for Artists
There are numerous sketching techniques that artists can use to create texture in their drawings. Here are a few:
- Hatching: This involves drawing closely spaced parallel lines. The closer the lines, the darker the area appears. It’s great for creating a range of tones and textures.
- Cross-hatching: This is similar to hatching but involves drawing another set of lines at an angle over the first set. It’s useful for creating darker tones and more complex textures.
- Stippling: This involves creating texture by drawing dots. The closer the dots, the darker the area appears. It’s great for creating a textured or grainy look.
- Scumbling: This involves creating texture by making circular marks with your pencil. It’s useful for creating a rough or chaotic texture.
These are just a few examples. There are many other techniques out there, and the best way to learn them is to practice and experiment. Remember, the goal is not to perfectly replicate a texture but to suggest it in a way that stimulates the viewer’s imagination.
Guide to Drawing Textures: Basic Concepts
In this section, we will delve into the fundamental concepts of drawing textures. Understanding these basics will provide a solid foundation for your artistic journey.
Understanding Texture
Texture in art is an element that brings life to your sketches. It adds depth and dimension, making your drawings more realistic and engaging. Let’s explore what texture is and why it’s crucial in sketching.
- Definition of texture in art
- Importance of texture in sketching
Texture refers to the perceived surface quality in a work of art. It is the visual or tactile surface characteristics and appearance of an artwork. It can be real or implied. Real texture can be felt with touch, while implied texture is created visually using different artistic techniques. For example, a drawing of a tree might have a rough and bumpy texture to represent the bark. Learn more about texture in art here.
Texture plays a significant role in sketching. It adds realism and depth to your drawings, making them more appealing and engaging. By mastering texture, you can convey the feel of the objects you’re drawing, whether it’s the roughness of a tree bark or the smoothness of a glass surface. It also helps to create visual interest and guide the viewer’s eye around the artwork. In essence, texture brings your sketches to life.
In the next section, we will explore various texture sketching techniques and how to choose the right one for your sketch. Stay tuned!
Texture Sketching Techniques
Texture sketching is an essential skill for any artist. It allows you to bring your drawings to life by adding depth and realism. In this section, we will explore different texture sketching techniques and provide guidance on how to choose the right technique for your sketch.
- Overview of Different Texture Sketching Techniques
- Hatching: This involves drawing closely spaced parallel lines. The closer the lines, the darker the texture appears.
- Cross-hatching: This is similar to hatching but involves drawing another set of lines at an angle to the first set.
- Stippling: This technique uses dots to create texture. The closer the dots, the darker the texture.
- Scumbling: This involves making circular marks with your pencil.
- How to Choose the Right Technique for Your Sketch
- If you are drawing something with a smooth texture, such as glass or metal, you might want to use the hatching or cross-hatching technique.
- If you are drawing something with a rough texture, such as fur or grass, you might want to use the stippling or scumbling technique.
- Experiment with different techniques to see which one works best for you. Practice is key to mastering these techniques.
There are several texture sketching techniques that artists use to create a sense of realism in their work. Here are a few:
Each of these techniques can create a unique texture, and you can combine them to achieve more complex effects. For more information on these techniques, you can visit the Wikipedia page on drawing.
Choosing the right texture sketching technique depends on what you are trying to achieve with your drawing. Here are a few tips:
Remember, there is no ‘one-size-fits-all’ approach to texture sketching. The technique you choose should help you achieve the desired effect in your drawing.
Artistic Texture Drawing: A Step-by-Step Tutorial
Creating art is a journey, and like any journey, it begins with preparation. In this section, we’ll guide you through the initial steps of creating a texture drawing, focusing on choosing the right materials and setting up your workspace.
Preparation
- Choosing the right materials
- Pencils: A variety of pencils is necessary to achieve different levels of hardness and softness in your drawing. A HB pencil is a good starting point for beginners.
- Paper: The texture of your paper can also affect your drawing. A smooth surface is ideal for detailed work, while a rough surface can add an interesting texture to your drawing.
- Eraser: A good eraser is necessary for correcting mistakes and creating highlights in your drawing.
- Setting up your workspace
- Lighting: Good lighting is crucial in drawing. Natural light is the best, but if that’s not possible, use a desk lamp with a daylight bulb.
- Comfort: Make sure you are comfortable while drawing. Use a chair with good back support and adjust your drawing table to a comfortable height.
- Organization: Keep your drawing tools within reach. This will save you time and help you focus on your drawing.
Choosing the right materials is essential in creating a successful texture drawing. The quality of your materials can greatly affect the outcome of your artwork. Here are some suggestions:
Having a well-organized workspace can greatly enhance your drawing experience. Here are some tips:
With the right materials and a comfortable workspace, you are now ready to start your journey in texture drawing. Remember, practice makes perfect. So, don’t be afraid to make mistakes and learn from them.
Sketching Textures Tutorial
Texture sketching is an essential skill for artists, allowing you to bring depth and realism to your drawings. This tutorial will guide you through the process step-by-step, and highlight some common mistakes to avoid.
- Step-by-step guide to sketching textures
- Observe: Start by observing the texture you want to sketch. Notice the details, how light interacts with it, and how it feels to the touch.
- Practice: Try to replicate the texture on a separate piece of paper. This will help you understand its structure and pattern.
- Sketch: Now, apply what you’ve learned to your drawing. Start lightly and gradually add more pressure to create depth and variation.
- Refine: Use erasers and blending tools to smooth out harsh lines and create a more realistic texture.
- Review: Finally, review your work. Look for areas that need improvement and practice them.
- Common mistakes to avoid
- Ignoring Light: Light plays a crucial role in how a texture appears. Ignoring this can result in a flat and unrealistic drawing.
- Over-detailing: While details are important, overdoing them can make your drawing look busy and confusing. Balance is key.
- Rushing: Good texture sketching takes time. Rushing through the process can lead to mistakes and poor quality work.
Texture sketching can seem daunting, but with practice, you can master it. Here’s a simple guide to get you started:
While sketching textures, artists often make a few common mistakes. Being aware of these can help you improve your skills:
Remember, practice makes perfect. The more you sketch, the better you’ll get at capturing different textures. Happy sketching!
Advanced Sketching Techniques for Artists
As an artist, mastering advanced sketching techniques can elevate your art to new heights. One such technique is the ability to render complex textures. This skill can add depth and realism to your work, making it more engaging and visually appealing.
Mastering Complex Textures
Complex textures can be challenging to sketch, but with the right techniques, you can create stunning, realistic textures that bring your art to life. Let’s explore some of these techniques and see examples of how they can be applied.
- Techniques for Sketching Complex Textures
- Cross-hatching: This technique involves drawing intersecting sets of parallel lines to create a textured effect. The closer the lines, the darker the texture appears.
- Stippling: This involves creating texture by using small dots. The closer the dots, the darker the texture appears. This technique is excellent for creating a rough texture.
- Scumbling: This is a technique where you create a texture by making small, circular motions with your pencil. This technique is great for creating a soft, smooth texture.
- Examples of Complex Texture Sketches
- The Bark of a Tree: This texture can be created using a combination of cross-hatching and stippling. The rough, uneven surface of the bark can be effectively depicted using these techniques.
- The Surface of Water: This texture can be created using scumbling. The soft, smooth surface of water can be effectively depicted using this technique.
- The Fur of an Animal: This texture can be created using a combination of all three techniques. The softness and roughness of the fur can be effectively depicted using these techniques.
Creating complex textures involves understanding the interplay of light and shadow, and how they affect the texture’s appearance. Here are a few techniques to help you master this:
Now that we’ve discussed some techniques, let’s look at a few examples of complex texture sketches:
Mastering complex textures is a skill that requires practice, but with these techniques, you can create stunning, realistic textures that bring your art to life. Remember, the key to successful texture sketching is observation and practice. So, grab your sketchbook and start practicing these techniques today!
Experimenting with Texture
Experimenting with texture in your artwork can open up a whole new world of possibilities. It can add depth, interest, and realism to your drawings. Let’s explore how you can experiment with different textures and learn from successful texture experiments.
- How to experiment with different textures
- Case study: Successful texture experiments
Experimenting with texture involves a lot of trial and error. Start by observing the world around you. Notice the textures in nature, in fabrics, in architecture. Try to replicate these textures in your sketches. Use different types of pencils, pens, and brushes. Experiment with different pressures, strokes, and techniques. Don’t be afraid to make mistakes. Each attempt is a step towards mastering the art of texture drawing.
Let’s look at the work of renowned artist Vincent Van Gogh. His painting, “Starry Night Over the Rhone”, is a perfect example of successful texture experimentation. Van Gogh used thick, swirling brushstrokes to create a sense of movement and texture in the night sky. The result is a captivating piece of art that draws the viewer in and holds their attention. This case study shows us that experimenting with texture can lead to unique and powerful artwork.
Remember, the key to successful texture experimentation is practice and patience. So, grab your sketchbook and start experimenting!
Art Texture Sketching Tips and Tricks
Mastering the art of texture sketching can be a game-changer for your artwork. It can add depth and realism to your sketches, making them more appealing and lifelike. Here are some top tips and tricks to help improve your texture sketching skills.
- Top tips for sketching textures
- How to improve your texture sketching skills
1. Observe and Study: Before you start sketching, take some time to observe the texture you want to draw. Look at how light interacts with the surface and how it changes the appearance of the texture. This will give you a better understanding of how to portray it in your sketch.
2. Experiment with Tools: Different tools can create different textures. Don’t limit yourself to just pencils. Try using charcoal, pastels, or even ink to create unique textures.
3. Vary Your Strokes: Varying the direction, length, and pressure of your strokes can help create a more realistic texture. Don’t be afraid to experiment and see what works best for you.
4. Practice: Like any other skill, practice is key to mastering texture sketching. The more you practice, the better you’ll get at it. Try to sketch different textures every day to improve your skills.
Improving your texture sketching skills is all about practice and experimentation. Here are some steps you can take to enhance your skills:
1. Draw from Life: Drawing from life is one of the best ways to improve your texture sketching skills. It allows you to observe and understand how different textures look and feel in real life.
2. Take Classes: Consider taking drawing classes or workshops that focus on texture sketching. This can provide you with professional guidance and feedback, helping you improve faster.
3. Use References: Using references can be incredibly helpful when you’re learning to sketch textures. You can find plenty of texture references online or in books.
4. Keep a Sketchbook: Keeping a sketchbook allows you to practice regularly and track your progress over time. It’s also a great way to experiment with different techniques and tools.
Remember, the key to mastering texture sketching is patience and practice. Keep experimenting with different techniques and tools, and don’t be afraid to make mistakes. With time and practice, you’ll be able to create stunning, lifelike textures in your sketches.
Conclusion: The Artist’s Guide to Texture Sketching
As we wrap up this comprehensive guide, let’s take a moment to revisit the key points we’ve covered and reflect on the importance of mastering texture in sketching. With practice and patience, you can transform your sketches from simple outlines to realistic, textured masterpieces.
- Recap of the texture sketching guide
- Final thoughts on mastering texture in art sketching
We began our journey into texture sketching with an introduction to the basic concepts, where we explored the importance of texture in art and how it can add depth and realism to your sketches. We then moved on to a step-by-step tutorial, guiding you through the process of drawing different textures, from the roughness of tree bark to the smoothness of a glass surface.
Next, we delved into advanced sketching techniques, introducing you to more complex textures and how to render them in your artwork. We also shared some valuable tips and tricks to enhance your texture sketching skills, such as observing real-life objects, practicing regularly, and experimenting with different drawing tools.
Mastering texture in art sketching is not an overnight process. It requires time, patience, and a lot of practice. But the rewards are worth the effort. By incorporating texture into your sketches, you can create more realistic and visually appealing artwork that captures the attention and imagination of your audience.
Remember, the key to successful texture sketching is observation. Take the time to study the textures around you, and don’t be afraid to experiment with different techniques and tools. With practice, you’ll soon find that you can recreate any texture you see with your pencil.
In conclusion, texture sketching is a powerful tool in the artist’s arsenal. It can transform your sketches from flat and two-dimensional into rich, three-dimensional works of art. So grab your sketchbook and start practicing – the world of texture sketching awaits!


