Introduction to Texture Sketching
Texture sketching is a fascinating aspect of art that brings drawings to life. It is a technique that uses lines, dots, and patterns to create the illusion of a real surface. In this post, we will explore the concept of texture in art and the importance of adding dimension to sketches.
-
- Understanding the concept of texture in art
Texture in art refers to the surface quality or “feel” of an object, its smoothness, roughness, softness, etc. Artists use texture to add depth, interest, or balance to different areas of their artwork. It is an element that can significantly enhance the realism of a sketch. For example, the rough texture of a tree bark or the smooth surface of a glass can be depicted using different sketching techniques.
-
- Importance of adding dimension to sketches
Adding dimension to sketches is crucial for creating a sense of depth and perspective in your artwork. It helps to make your sketches look more realistic and three-dimensional. Without dimension, a sketch may appear flat and less engaging. By using shading, overlapping, and size variation, artists can create the illusion of depth and space in their sketches.
In the following sections, we will delve deeper into texture sketching techniques, how to add dimension in artwork, and provide some artwork sketching tips. We will also look at some case studies that demonstrate the successful use of texture and dimension in art sketching. So, let’s embark on this exciting journey of exploring the world of texture sketching.
Texture Sketching Techniques
Texture is an essential element of sketching that brings life and realism to your artwork. It’s the visual quality that allows us to distinguish between different surfaces and materials. Let’s explore some basic techniques for sketching texture.
Basic Techniques for Sketching Texture
Even if you are a beginner, you can create impressive textures in your sketches. Here are three fundamental techniques that you can start practicing today:
- Using different pencil grades: Pencils come in a variety of grades, each creating a different level of darkness or lightness. For example, a 2B pencil is darker and softer than a 2H pencil, which is lighter and harder. By varying the pencil grade, you can create a range of textures, from smooth and shiny to rough and gritty.
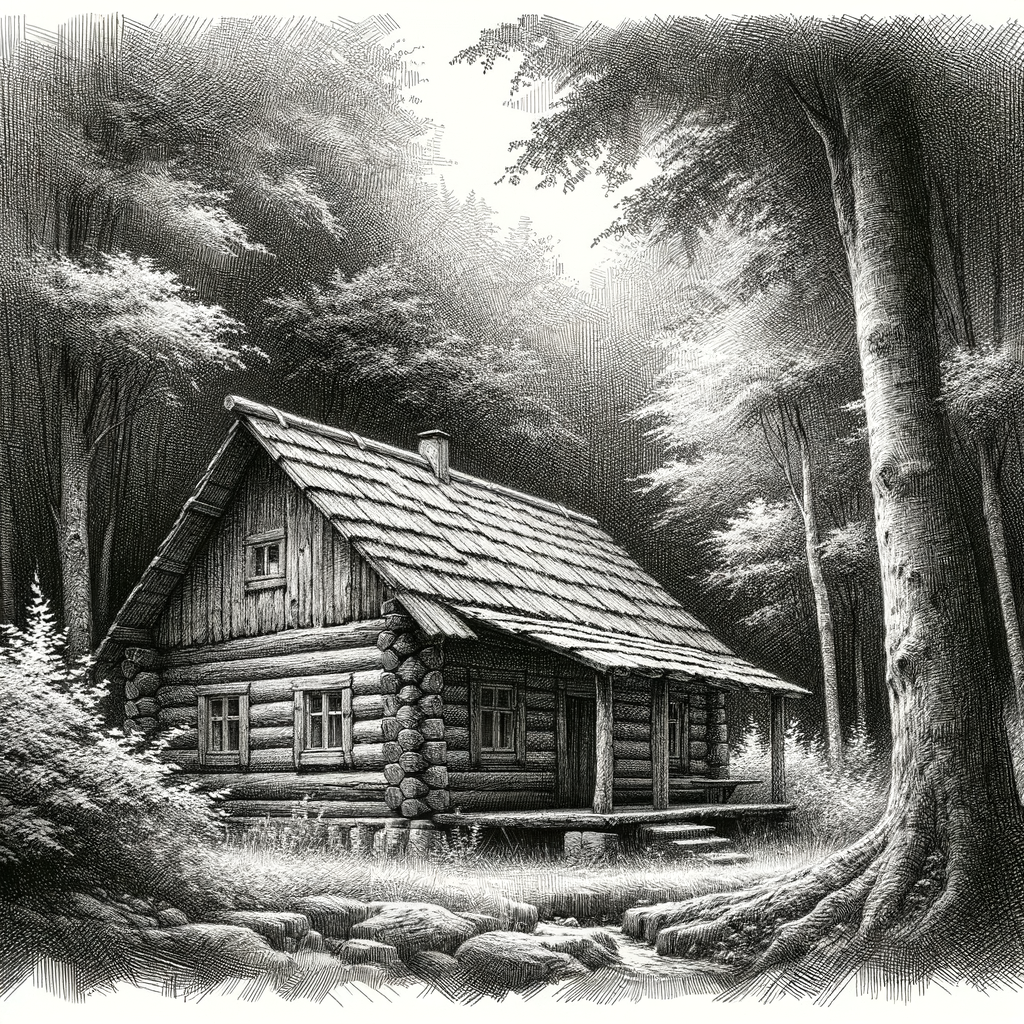
- Creating texture with hatching and cross-hatching: Hatching involves drawing parallel lines close together, while cross-hatching involves drawing intersecting sets of parallel lines. These techniques can create a sense of depth and texture, making your sketches more realistic.
- Stippling technique: Stippling involves creating a pattern using small dots. The closer the dots, the darker the area appears. This technique is great for creating textures like sand, dirt, or even skin.
Remember, practice is key when it comes to mastering these techniques. Don’t be discouraged if your first few attempts don’t turn out as you’d like. Keep trying, and you’ll see improvement over time.
Now that you’ve learned these basic techniques, you’re well on your way to creating more realistic and engaging sketches. In the next section, we’ll delve into some advanced techniques for sketching texture. Stay tuned!
Advanced Techniques for Sketching Texture
As we delve deeper into the world of texture sketching, it’s important to explore some advanced techniques that can take your artwork to the next level. These methods require a bit more practice, but the results are truly rewarding. Let’s take a look at some of these techniques.
- Blending and Layering
Blending and layering are two techniques that can add depth and realism to your sketches. By carefully layering different shades of pencil, you can create a rich, textured effect. Blending, on the other hand, involves smoothing out the pencil strokes to create a seamless transition between different shades. This technique is particularly useful for creating realistic skin textures or the softness of a cloud.
- Using Erasers for Texture Creation
Believe it or not, erasers are not just for correcting mistakes. They can also be used creatively to add texture to your sketches. By lightly erasing certain areas of your sketch, you can create highlights and add depth to your work. Different types of erasers, like kneaded or gum erasers, can create different effects, so don’t be afraid to experiment!
- Adding Texture with Unconventional Tools
Finally, don’t limit yourself to just pencils and erasers. There are many unconventional tools that you can use to add texture to your sketches. For example, a piece of crumpled paper can be used to create a rough texture, while a cotton swab can be used for soft blending. The possibilities are endless, so let your creativity run wild!
Remember, the key to mastering these advanced techniques is practice. Don’t be discouraged if your first few attempts don’t turn out as expected. Keep trying, and you’ll soon be creating textured sketches that are full of depth and realism.
| Technique | Description |
|---|---|
| Blending and Layering | Layering different shades of pencil and blending them for a seamless transition. |
| Using Erasers for Texture Creation | Using erasers to create highlights and add depth to the sketch. |
| Adding Texture with Unconventional Tools | Using unconventional tools like crumpled paper or cotton swabs to add texture. |
Dimension in Artwork
Dimension in artwork is a crucial concept that brings life and depth to an otherwise flat image. It’s what makes a drawing seem real and tangible, as if you could reach out and touch it. But how does it work? Let’s delve into this fascinating topic.
Understanding Dimension in Art
Dimension in art is about creating a sense of depth and space. It’s about making a two-dimensional surface look like it has three dimensions – height, width, and depth. This is achieved through various techniques and principles, two of which we will discuss here: the concept of perspective in drawing and the role of light and shadow in creating dimension.
-
- Concept of Perspective in Drawing
Perspective is a technique used to represent three-dimensional objects on a two-dimensional surface (like a piece of paper) in a way that looks realistic. It’s all about creating an illusion of depth and distance. For example, objects that are further away are drawn smaller than those that are close. This gives the viewer a sense of depth and distance.
-
- Role of Light and Shadow in Creating Dimension
Light and shadow play a crucial role in creating dimension in art. By carefully observing how light falls on an object and how shadows are cast, artists can create a convincing sense of depth. Shadows can indicate the shape of an object, its position in relation to the light source, and its distance from other objects. In essence, proper use of light and shadow can make a flat image appear three-dimensional.
Understanding and mastering these principles can significantly enhance the quality of your artwork, making it more realistic and visually appealing. Remember, practice is key when it comes to improving your drawing skills. So, keep practicing and experimenting with these techniques to create stunning, dimensional artwork.
Techniques for Adding Dimension to Sketches
Adding dimension to your sketches can make them look more realistic and engaging. Here are three techniques that can help you achieve this:
-
- Using Scale and Detail to Create Depth
Scale and detail can be powerful tools in creating a sense of depth in your sketches. By varying the size and level of detail in your drawings, you can create the illusion of objects being closer or further away. For example, objects that are closer to the viewer are usually drawn larger and with more detail, while objects that are further away are drawn smaller and with less detail. This technique can make your sketches look more three-dimensional and realistic.
-
- Creating a Sense of Space with Overlapping
Overlapping is another effective technique for adding dimension to your sketches. By drawing some objects in front of others, you can create a sense of depth and space. This technique can be particularly useful when you’re drawing complex scenes with many objects. Remember, the object that is in front will cover part of the object that is behind, creating a sense of depth and space.
-
- Using Shading and Tonal Contrast
Shading and tonal contrast can also help to add dimension to your sketches. By varying the lightness and darkness of your lines and shapes, you can create the illusion of light and shadow. This can make your sketches look more three-dimensional and lifelike. For example, areas of your sketch that are in shadow should be darker, while areas that are in light should be lighter. This contrast in tone can create a sense of depth and dimension.
By mastering these techniques, you can add dimension to your sketches and make them more engaging and realistic. Remember, practice is key when it comes to improving your sketching skills. So, don’t be afraid to experiment with these techniques and see what works best for you.
Artwork Sketching Tips
As an artist, your sketching skills are crucial to your craft. They form the foundation of your artwork, allowing you to bring your ideas to life on paper. Here are some tips to help you improve your sketching skills:
-
- Practicing Observation Skills
Observation is a key skill in sketching. It’s about more than just looking at an object or scene; it’s about really seeing it. This means noticing the small details, the way the light hits different surfaces, and the subtle variations in color and texture. A good way to practice this is to spend time each day just observing the world around you. Try to notice things you’ve never noticed before, and then try to sketch them.
-
- Experimenting with Different Materials
Don’t limit yourself to just one type of sketching material. Experiment with different types of pencils, pens, and even paints. Each material has its own unique properties and can create different effects in your sketches. For example, a soft pencil can create dark, bold lines, while a hard pencil can create light, delicate lines. Experimenting with different materials can help you discover new techniques and styles.
-
- Studying and Replicating Textures from Real Life
Textures can add depth and realism to your sketches. To get better at drawing textures, spend time studying them in real life. Look at the texture of a tree bark, a brick wall, or a piece of fabric. Notice the patterns, the variations in color, and the way the texture changes with the light. Then, try to replicate these textures in your sketches. This can be a challenging exercise, but with practice, you’ll get better at it.
Remember, improving your sketching skills takes time and practice. Don’t get discouraged if you don’t see immediate results. Keep practicing, keep experimenting, and keep observing, and you’ll see improvement over time.
Case Studies: Successful Use of Texture and Dimension
In this section, we will explore how artists successfully use texture and dimension in their artwork. We will look at two case studies that highlight these techniques.
Case Study 1: Drawing with Texture
Our first case study focuses on an artist renowned for their unique approach to texture sketching. This artist has managed to create depth and realism in their sketches using texture.
- Artist’s approach to texture sketching: This artist believes that texture is the key to bringing a sketch to life. They start by observing the texture of the object they are sketching. They then use a variety of pencil strokes to mimic this texture on paper. For example, for a rough texture, they might use short, jagged lines. For a smooth texture, they might use long, flowing lines.
- Techniques used and their effect on the artwork: The artist uses a combination of hatching, cross-hatching, and stippling to create texture. Hatching involves drawing parallel lines, while cross-hatching involves drawing intersecting sets of parallel lines. Stippling involves using dots to create texture. These techniques give the artwork a sense of depth and realism. They make the viewer feel as if they could reach out and touch the object in the sketch.
In conclusion, this case study shows that texture can significantly enhance a sketch. It can make the sketch more realistic and engaging. The artist’s approach and techniques can serve as an inspiration for budding artists.
Case Study 2: Dimensional Sketching
Dimensional sketching is a powerful tool that artists use to bring their artwork to life. In this case study, we will explore how one particular artist uses dimension in their sketches and the impact it has on the overall artwork.
-
- Artist’s approach to adding dimension
The artist in this case study, who we will refer to as Artist B, uses a unique approach to add dimension to their sketches. Artist B starts with a basic outline of the subject. Then, they gradually add layers of shading to create the illusion of depth and dimension. They use a variety of pencil grades, from 2H for light areas to 6B for the darkest shadows. This technique is known as ‘value sketching’.
Artist B also uses perspective drawing techniques to add dimension. They consider the viewpoint of the observer and adjust the size and position of the objects in the sketch accordingly. For example, objects closer to the viewer are drawn larger, while those further away are drawn smaller. This creates a sense of depth and three-dimensionality in the sketch.
-
- Impact of dimension on the overall artwork
The use of dimension has a significant impact on Artist B’s artwork. It transforms a flat, two-dimensional sketch into a realistic, three-dimensional scene. The viewer feels as if they could reach out and touch the objects in the sketch, or step into the scene. This is the power of dimensional sketching.
By adding dimension, Artist B is able to convey a sense of space and depth in their sketches. This makes the artwork more engaging and visually appealing. It also allows the artist to express their vision more effectively and create a stronger emotional connection with the viewer.
Dimensional sketching is a key skill for any artist. It can enhance the realism and visual appeal of your artwork, and help you to express your creative vision more effectively. So why not give it a try in your next sketch?
Conclusion: The Impact of Texture and Dimension on Art Sketching
In this article, we’ve explored the fascinating world of texture sketching and dimension in artwork. We’ve learned how these two elements can bring a simple sketch to life, making it more realistic and appealing. Now, let’s recap what we’ve learned and understand why continuous practice and experimentation are crucial in mastering these techniques.
- Recap of texture sketching techniques and dimension in artwork
Texture sketching is a technique that allows artists to create a sense of touch and feel in their sketches. We’ve discussed various techniques like cross-hatching, stippling, and scumbling, each with its unique effect. Similarly, adding dimension to artwork is about creating depth and perspective. We’ve seen how using shading, overlapping, and size and placement can make a flat sketch appear three-dimensional.
- Importance of continuous practice and experimentation
Mastering texture sketching and dimension in artwork doesn’t happen overnight. It requires continuous practice and a willingness to experiment. Remember, every artist has their unique style, and it’s through practice and experimentation that you’ll discover yours. Don’t be afraid to make mistakes – they’re part of the learning process.
Lastly, texture and dimension are powerful tools in an artist’s arsenal. They can transform a simple sketch into a piece of art that tells a story, evokes emotions, and captivates the viewer. So, keep practicing, keep experimenting, and most importantly, keep creating.
Remember, “Every artist was first an amateur.” – Ralph Waldo Emerson.


