The Art of Hyper-Realistic Portraits
Introduction to Hyper-Realistic Portraits
-
Definition of Hyper-Realistic Portraits
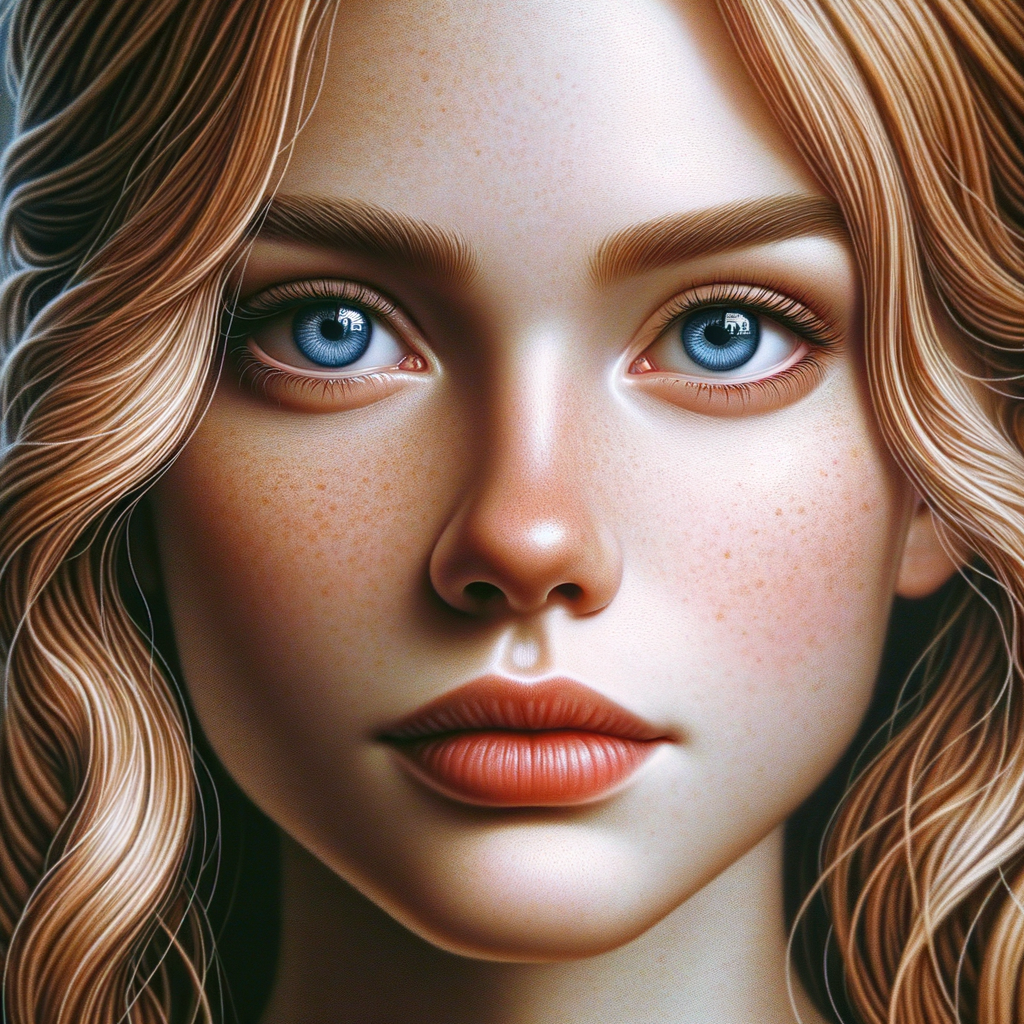
Hyper-realistic portraits are artworks that look almost like real photos. Artists use fine details to make them very lifelike. These portraits show every tiny feature, like wrinkles, hair, and even pores.
-
History and Evolution of Hyper-Realistic Portraits
Hyper-realism began in the early 1970s. Artists wanted to create art that looked more real than ever before. Over time, techniques improved, and artists started using new tools and materials to achieve even greater detail.
-
Importance and Influence of Hyper-Realistic Portraits in Art
Hyper-realistic portraits have a big impact on the art world. They show the artist’s skill and patience. These portraits also make people think about what is real and what is art. Many artists are inspired by hyper-realism to push their own limits.
| Aspect | Details |
|---|---|
| Definition | Artworks that look like real photos |
| History | Started in the 1970s, evolved with new tools |
| Importance | Shows skill, inspires other artists |
Hyper-Realistic Portrait Techniques
-
Understanding the Basics
To start with hyper-realistic portraits, you need to understand the basics. This includes knowing your tools like pencils, erasers, and paper. It’s also important to study the human face. Look at photos and real people to see how light and shadow work. Practice drawing simple shapes first, like circles and ovals, to get the hang of it.
-
Mastering the Details
Details make a portrait look real. Pay attention to small things like wrinkles, freckles, and hair strands. Use a sharp pencil for fine lines. Take your time and be patient. Look closely at your reference photo and try to copy every tiny detail. This will make your drawing look more lifelike.
-
Perfecting the Shading
Shading gives your portrait depth. It shows where the light hits and where the shadows fall. Use different pencil pressures to create light and dark areas. Practice blending with tools like blending stumps or tissues. Remember, smooth transitions between light and dark make your portrait look more real.
Shading Technique Purpose Hatching Creates texture with parallel lines Cross-Hatching Adds depth with intersecting lines Blending Smooths out shading for a soft look -
Adding Texture and Depth
Texture and depth make your portrait pop. Use different pencil strokes to show different textures like skin, hair, and fabric. For example, short, quick strokes can show rough skin, while long, smooth strokes can show silky hair. Adding layers of shading can also give your drawing more depth.
“The details are not the details. They make the design.” – Charles Eames
Hyper-Realistic Portrait Artists
- Notable Artists in the Field
- Impact of Their Work
- Case Study: Artist’s Approach to Hyper-Realistic Portraits
Hyper-realistic portraits are a special kind of art. Some artists are very famous for their work in this field. These artists include Chuck Close, known for his large-scale portraits, and Gottfried Helnwein, who creates very detailed and emotional pieces. Another notable artist is Alyssa Monks, who uses water and steam to add a unique touch to her portraits.
The work of these artists has a big impact on the art world. Their portraits often look like photographs, making people stop and look closely. This level of detail can make viewers feel strong emotions. It also pushes other artists to improve their skills and try new techniques. Hyper-realistic portraits can make people think about what is real and what is art.
Let’s look at how Chuck Close creates his hyper-realistic portraits. He starts with a photograph of the person. Then, he uses a grid system to break down the photo into small squares. Each square is painted one at a time, focusing on tiny details. This method helps him achieve a high level of realism. Close’s approach shows that patience and attention to detail are key in hyper-realistic art.
How to Draw Hyper-Realistic Portraits
Hyper-Realistic Portrait Tutorials
-
Step-by-Step Guide to Drawing a Hyper-Realistic Portrait
Creating a hyper-realistic portrait can be an exciting challenge. Follow these steps to get started:
- Gather Your Materials: You will need pencils, erasers, and high-quality paper.
- Choose a Reference Photo: Pick a clear, high-resolution image.
- Outline the Basic Shapes: Lightly sketch the basic shapes of the face.
- Add Details: Gradually add details like eyes, nose, and mouth.
- Shade and Blend: Use different pencil grades to add depth and blend for smooth transitions.
- Refine and Finish: Add final touches to make the portrait look realistic.
-
Common Mistakes and How to Avoid Them
Even experienced artists can make mistakes. Here are some common ones and tips to avoid them:
- Proportions: Ensure the facial features are correctly proportioned. Use guidelines to help.
- Overworking: Avoid overworking areas. It can make the drawing look muddy.
- Ignoring Light Source: Always consider the light source to create realistic shadows and highlights.
- Rushing: Take your time. Hyper-realistic art requires patience.
-
Advanced Techniques for More Experienced Artists
For those with more experience, try these advanced techniques:
- Layering: Build up layers of pencil strokes to create texture and depth.
- Using Different Tools: Experiment with blending stumps, erasers, and even brushes.
- Detail Work: Focus on tiny details like skin texture, hair strands, and reflections in the eyes.
- Contrast: Play with contrast to make certain areas pop and add realism.
| Tip | Description |
|---|---|
| Patience | Take your time to build up layers and details. |
| Observation | Study your reference photo carefully. |
| Practice | Regular practice will improve your skills. |
| Tools | Use high-quality pencils and paper for best results. |
Hyper-Realistic Portrait Painting
-
Difference Between Drawing and Painting Hyper-Realistic Portraits
Drawing and painting hyper-realistic portraits may seem similar, but they are quite different. Drawing usually involves pencils or charcoal, while painting uses brushes and paints. Drawing focuses on lines and shading, whereas painting emphasizes color and texture. Both require keen observation and skill, but the techniques and tools vary significantly.
-
Materials and Tools Needed for Painting
To paint a hyper-realistic portrait, you need specific materials and tools:
- Canvas: A good quality canvas is essential.
- Paints: Use acrylic or oil paints for vibrant colors.
- Brushes: Different sizes and types of brushes for various details.
- Palette: For mixing colors.
- Palette Knife: Useful for mixing and applying paint.
- Water or Solvent: For cleaning brushes and thinning paint.
- Reference Photo: A high-quality photo to guide your work.
-
Step-by-Step Guide to Painting a Hyper-Realistic Portrait
Follow these steps to paint a hyper-realistic portrait:
- Prepare Your Canvas: Start with a clean, primed canvas.
- Sketch the Outline: Lightly sketch the portrait using a pencil.
- Base Colors: Apply base colors to the main areas of the portrait.
- Layering: Build up layers of paint to add depth and detail.
- Details: Use fine brushes for intricate details like eyes and hair.
- Blending: Blend colors smoothly to avoid harsh lines.
- Final Touches: Add highlights and shadows to enhance realism.
- Drying: Allow the painting to dry completely before framing or displaying.
Remember, practice makes perfect. The more you paint, the better you will become.
Mastering Hyper-Realistic Portraits
Hyper-Realistic Portrait Tips
-
Practicing Regularly:
To master hyper-realistic portraits, practice is key. Drawing every day helps you improve your skills. Try to set aside at least 30 minutes each day for sketching. The more you practice, the better you will get.
-
Studying from Real Life:
Study real people and objects to understand details better. Observing how light and shadow play on different surfaces can help you create more realistic portraits. Try drawing from live models or photographs to see how features change with different angles and lighting.
-
Seeking Feedback and Critique:
Getting feedback from others can help you improve. Show your work to friends, family, or art teachers. They can point out areas that need more work and offer suggestions. Joining an art group or online community can also provide valuable critiques.
| Tip | Key Insight |
|---|---|
| Practicing Regularly | Draw every day to improve your skills. |
| Studying from Real Life | Observe real people and objects to understand details. |
| Seeking Feedback and Critique | Get feedback from others to identify areas for improvement. |
Hyper-Realistic Portrait Materials
-
Recommended Drawing and Painting Tools
To create hyper-realistic portraits, you need the right tools. Here are some must-haves:
- Pencils: Use a range of pencils from 2H to 8B for different shades.
- Blending Stumps: These help in smoothing out pencil strokes.
- Erasers: A kneaded eraser is great for lightening areas, while a precision eraser helps with fine details.
- Brushes: Fine-tipped brushes are essential for detailed painting.
- Paper: High-quality, smooth paper is best for detailed work.
-
Choosing the Right Materials for Your Artwork
Selecting the right materials can make a big difference in your artwork. Here are some tips:
- Quality Over Quantity: Invest in high-quality tools rather than many low-quality ones.
- Test Before You Buy: Always test materials to see how they perform.
- Consider Your Style: Choose materials that suit your drawing or painting style.
Here is a table summarizing key materials:
Material Purpose Pencils Shading and detailing Blending Stumps Smoothing pencil strokes Erasers Correcting and lightening areas Brushes Detailed painting Paper Surface for drawing/painting -
Maintaining Your Art Supplies
Keeping your art supplies in good condition is important. Here’s how:
- Clean Brushes: Wash brushes after each use to keep them in good shape.
- Store Properly: Keep pencils and brushes in a case to protect them.
- Sharpen Regularly: Keep pencils sharp for precise lines.
- Replace When Needed: Don’t hesitate to replace worn-out tools.
Remember, taking care of your tools helps you create better art!
Hyper-Realistic Portrait Examples and Inspiration
Hyper-Realistic Portrait Examples
-
Analysis of Notable Hyper-Realistic Portraits
Hyper-realistic portraits are stunning. They look like photographs but are made by hand. Let’s look at some famous examples:
- Chuck Close’s “Big Self-Portrait”: This portrait is huge and shows every tiny detail of the artist’s face.
- Omar Ortiz’s “Lucia”: This piece captures the softness of the skin and the sparkle in the eyes.
- Gottfried Helnwein’s “Epiphany”: This work is so detailed that it almost feels like the person is standing in front of you.
These artists use different techniques to make their portraits look real. They pay close attention to light, shadow, and texture.
-
Understanding the Techniques Used
Creating hyper-realistic portraits takes skill and patience. Here are some techniques artists use:
- Layering: Artists build up layers of paint or pencil to create depth.
- Blending: Smooth transitions between colors make the skin look real.
- Detailing: Tiny details like pores and wrinkles add to the realism.
These techniques help artists create portraits that look just like real people.
Hyper-Realistic Portrait Inspiration
-
Finding Inspiration in Everyday Life
Inspiration can be found all around us. Look at the people you see every day. Notice their expressions, the way light falls on their faces, and the unique features that make them who they are. Even simple moments, like a smile or a thoughtful look, can spark ideas for your portraits.
For example, consider the way sunlight creates shadows on a person’s face during a morning walk. These small details can add depth and realism to your art.
-
Exploring Different Themes and Subjects
Don’t limit yourself to one type of subject. Explore various themes like emotions, age, and culture. Drawing children, adults, and elderly people can help you understand different facial structures and expressions.
Try capturing different moods, such as joy, sadness, or surprise. Each emotion brings out unique features in a person’s face, adding to the realism of your portrait.
Theme Example Emotion Joy, Sadness, Surprise Age Children, Adults, Elderly Culture Traditional Attire, Cultural Expressions -
Creating Your Own Unique Style
While it’s important to learn from others, developing your own style is key. Experiment with different techniques and materials. Maybe you prefer using pencils, or perhaps you enjoy working with charcoal or pastels.
Think about what makes your art special. Is it the way you capture light? Or perhaps the fine details you include? Your unique style will set your work apart and make it recognizable.
“Art is not what you see, but what you make others see.” – Edgar Degas