
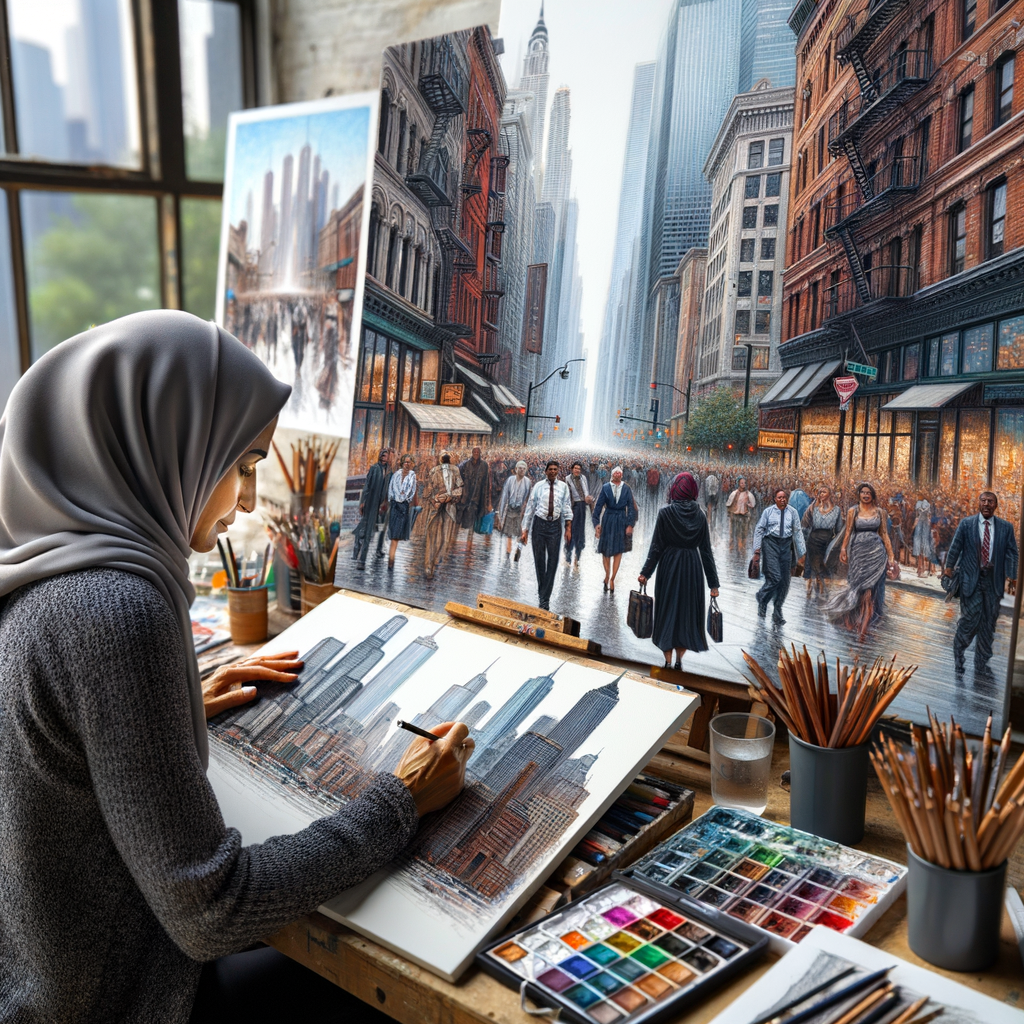
Introduction to Urban Street Sketching
- Definition of Urban Street Sketching: Urban street sketching is the art of drawing scenes from city life. Artists capture buildings, people, and everyday activities using pencils, pens, or watercolors. It is done on location, meaning artists sketch what they see in real-time.
- The Importance of Urban Street Sketching: Urban street sketching helps preserve the beauty of city life. It allows artists to document changes in the urban landscape. This form of art also encourages people to observe their surroundings more closely. It can be a relaxing and rewarding hobby.
- How Urban Street Sketching Differs from Other Forms of Sketching: Unlike studio sketching, urban street sketching is done outdoors. Artists must work quickly to capture scenes before they change. This type of sketching often includes more details of daily life. It focuses on the hustle and bustle of the city, making it unique and dynamic.
Urban Sketching Techniques
Basic Techniques
-
Observation
Observation is the first step in urban sketching. Look closely at your surroundings. Notice the shapes, lines, and details. Pay attention to how light and shadow play on surfaces. Good observation helps you capture the essence of the scene.
-
Composition
Composition is about arranging elements in your sketch. Think about what you want to include in your drawing. Use the rule of thirds to place important parts of the scene. This makes your sketch more interesting and balanced.
-
Shading
Shading adds depth to your sketch. Use light and dark areas to show where the light hits and where shadows fall. Practice different shading techniques like hatching and cross-hatching. This will make your sketches look more realistic.
| Technique | Key Points |
|---|---|
| Observation | Notice shapes, lines, and details. Observe light and shadow. |
| Composition | Arrange elements using the rule of thirds. Create balance and interest. |
| Shading | Use light and dark areas. Practice hatching and cross-hatching. |
Advanced Techniques
-
Adding Depth and Perspective
Adding depth and perspective makes your sketches look real. One way to do this is by using vanishing points. These are points where lines seem to meet in the distance.
For example, when drawing a street, the sides of the street get closer together as they go farther away. This creates a sense of depth.
Another tip is to draw objects smaller as they get further away. This trick helps show distance in your sketch.
Technique Effect Vanishing Points Creates depth Size Variation Shows distance -
Rendering Textures
Textures make your sketches more interesting. They show what things feel like. For example, bricks have a rough texture, while glass is smooth.
To draw textures, use different lines and shapes. For a rough texture, use short, jagged lines. For a smooth texture, use long, even lines.
Practice drawing different textures to improve your skills. Try sketching wood, metal, and fabric to see how they differ.
-
Using Color Effectively
Color adds life to your sketches. It can show mood and time of day. For example, warm colors like red and orange can make a scene feel lively. Cool colors like blue and green can make it feel calm.
Use light and dark colors to show shadows and highlights. This helps objects look three-dimensional.
Experiment with different color combinations. See how they change the feeling of your sketch.
Color Effect Warm Colors Lively Cool Colors Calm
Street Art Sketching
- Understanding the elements of street art
Street art is a unique form of expression. It includes graffiti, murals, and stencils. These elements make the streets colorful and lively. To sketch street art, you need to understand its key parts:
- Graffiti: This is often bold and colorful. It can include letters, words, or images.
- Murals: These are large paintings on walls. They tell stories or show important messages.
- Stencils: These are designs cut out of paper or cardboard. Artists spray paint over them to create sharp images.
- How to incorporate street art into your sketches
Adding street art to your sketches can make them more exciting. Here are some tips:
- Observe: Look at different street art in your city. Notice the colors, shapes, and styles.
- Practice: Try drawing graffiti letters or simple stencils. Use bright colors to make your sketches pop.
- Blend: Mix street art elements with your urban sketches. For example, draw a building with a mural on it.
- Examples of successful street art sketches
Many artists have made amazing street art sketches. Here are a few examples:
| Artist | Style | Notable Work |
|---|---|---|
| Banksy | Stencils | Girl with Balloon |
| Shepard Fairey | Posters and Stencils | Hope Poster |
| Keith Haring | Murals | Crack is Wack |
These artists use different techniques to create powerful images. You can learn from their work and try similar styles in your sketches.
Cityscape Drawing
Basic Cityscape Drawing Techniques
-
Understanding Perspective
Perspective is key to making your cityscape look real. It helps show how objects get smaller as they go farther away. Start by drawing a horizon line. Then, add vanishing points. These points guide where your lines should go.
For example, if you’re drawing a street, the lines of the buildings should meet at the vanishing point. This makes your drawing look 3D.
-
Sketching Buildings
Begin with simple shapes. Use rectangles and squares to outline buildings. Don’t worry about details yet. Just focus on getting the basic shapes right.
Next, add more lines to show the sides of the buildings. Use your vanishing points to keep the perspective correct. This step is like building the skeleton of your cityscape.
-
Adding Details to Your Cityscape
Now it’s time to add details. Draw windows, doors, and rooftops. These small elements make your cityscape come alive.
Think about the texture of the buildings. Are they made of brick, glass, or wood? Add lines and patterns to show these textures. This makes your drawing more interesting.
Finally, add some trees, streetlights, or cars. These details give your cityscape personality and make it look complete.
| Technique | Key Points |
|---|---|
| Understanding Perspective | Use horizon lines and vanishing points to create depth. |
| Sketching Buildings | Start with basic shapes and use perspective lines. |
| Adding Details | Include windows, doors, and textures to bring your cityscape to life. |
Advanced Cityscape Drawing Techniques
-
Creating a Sense of Depth
To make your cityscape look real, you need to create depth. Depth makes your drawing look 3D. Use overlapping objects to show which ones are closer and which are farther away. For example, draw a building in front of another building. This makes the front building look closer.
Another way is to use size variation. Objects that are closer appear larger. Objects that are farther away appear smaller. This trick helps your drawing look more realistic.
-
Rendering Light and Shadow
Light and shadow add life to your cityscape. They show where the light comes from and how it affects objects. First, decide where your light source is. It could be the sun or a street lamp.
Next, add shadows on the opposite side of the light source. For example, if the sun is on the left, shadows will be on the right. Use shading techniques like hatching or cross-hatching to create shadows. This gives your drawing a more dynamic look.
-
Adding People and Vehicles to Your Cityscape
People and vehicles make your cityscape lively. They show that the city is bustling with activity. Start by drawing simple shapes for people and vehicles. For example, use circles for heads and rectangles for bodies.
Place them in different parts of your drawing. Some can be walking on the sidewalk, while others can be driving on the road. This adds movement and makes your cityscape more interesting.
| Technique | Description |
|---|---|
| Creating Depth | Use overlapping and size variation to show distance. |
| Light and Shadow | Decide on a light source and add shadows accordingly. |
| People and Vehicles | Add simple shapes to represent people and vehicles. |
Urban Sketching Tips
-
Choosing the Right Materials
Having the right tools can make a big difference in your sketches. Start with a good sketchbook. Look for one with thick paper that can handle different types of ink and paint. Next, pick some pens and pencils. Fine-liner pens are great for details, while softer pencils are good for shading. Watercolors can add a splash of color to your sketches. Remember, you don’t need the most expensive tools. Just find what works best for you.
-
Practicing Regularly
Like any skill, practice is key. Try to sketch something every day. It doesn’t have to be perfect. The more you practice, the better you’ll get. Set aside a little time each day to draw. Even 10 minutes can help. Keep a small sketchbook with you. This way, you can sketch whenever you have a free moment. Practice helps you see the world in new ways and improves your drawing skills.
-
Joining a Sketching Group
Sketching with others can be fun and inspiring. Look for a local sketching group or join one online. Being part of a group gives you a chance to share tips and learn from others. You can also get feedback on your work. Plus, it’s a great way to meet new people who share your interest in urban sketching. Many cities have sketching meetups where you can draw together and explore new places.
Street Sketching Tutorials
Beginner Tutorials
-
Getting Started with Street Sketching
Street sketching is a fun way to capture the world around you. To start, all you need is a sketchbook and a pencil. Find a comfortable spot and observe your surroundings. Look for interesting buildings, people, or scenes to draw.
Here are some tips to get you started:
- Choose a simple subject: Start with something easy like a bench or a tree.
- Use light strokes: Begin with light pencil strokes to outline your sketch.
- Stay relaxed: Don’t worry about making it perfect. Enjoy the process!
-
Basic Street Sketching Techniques
Once you are comfortable with the basics, you can try some simple techniques to improve your sketches. Here are a few:
Technique Description Hatching Use parallel lines to create shading and texture. Cross-Hatching Layer lines in different directions for deeper shading. Contour Drawing Draw the outline of your subject without lifting your pencil. Practice these techniques to add depth and detail to your sketches.
-
Creating Your First Street Sketch
Now that you know the basics, it’s time to create your first street sketch. Follow these steps:
- Pick a scene: Choose a busy street corner or a quiet park.
- Outline the main shapes: Draw the big shapes first, like buildings and trees.
- Add details: Fill in smaller details like windows, doors, and people.
- Shade and texture: Use hatching and cross-hatching to add depth.
Remember, practice makes perfect. Keep sketching and you will see improvement over time.
Intermediate Tutorials
-
Improving your street sketching skills
To get better at street sketching, practice is key. Spend time sketching different scenes in your city. Focus on capturing the details and the essence of the place. Try to sketch quickly to capture the moment.
Tip: Use a timer to limit your sketching time. This helps you to focus on the most important elements.
Practice Tips Benefits Sketch daily Improves consistency Use different tools Enhances versatility Join a sketching group Provides feedback -
Exploring different styles of street sketching
Street sketching has many styles. You can try realistic, abstract, or even cartoonish styles. Experiment with different techniques to find what you enjoy the most.
“Art is not what you see, but what you make others see.” – Edgar Degas
Here are some styles to explore:
- Realistic: Focus on accurate details and proportions.
- Abstract: Use shapes and colors to represent the scene.
- Cartoonish: Exaggerate features for a fun effect.
-
Creating more complex street sketches
As you improve, try adding more elements to your sketches. Include people, vehicles, and intricate details. This will make your sketches more dynamic and interesting.
Example: Sketch a busy market scene with vendors, shoppers, and stalls. Capture the hustle and bustle.
Remember to:
- Start with a light outline.
- Add details gradually.
- Use shading to create depth.
Urban Sketching Supplies
When starting with urban sketching, having the right supplies can make a big difference. Here are some key items you will need:
-
Choosing the Right Sketchbook
Your sketchbook is your canvas. Look for one with thick paper that can handle different mediums like ink and watercolor. A good size is around 5×8 inches. This size is easy to carry but still gives you enough space to draw.
-
Recommended Pens and Pencils
For fine lines, use pens with waterproof ink. Micron pens are a popular choice. For shading, soft pencils like 2B or 4B work well. Mechanical pencils are also great for detail work.
-
Other Useful Sketching Tools
Besides pens and pencils, there are other tools that can help:
- Erasers: A kneaded eraser is good for lightening areas without leaving residue.
- Water Brushes: These brushes have a water reservoir, making it easy to add watercolor to your sketches.
- Portable Easel: If you like to stand while sketching, a small, portable easel can be very useful.
Having the right supplies can make your urban sketching experience more enjoyable and productive. Invest in good quality tools to help you create beautiful sketches of the city around you.
Sketching Urban Scenes
Choosing Your Scene
-
What to look for in an urban scene
When choosing an urban scene to sketch, look for interesting buildings, busy streets, and unique landmarks. These elements add character to your sketch. For example, a street with colorful shops or a park with people can make your drawing lively.
-
How to choose a good vantage point
Finding the right spot to sketch from is important. Choose a place where you can see the whole scene without too many obstructions. A bench in a park or a café with a good view can be ideal. Make sure you are comfortable and have enough space for your sketching materials.
-
Considering the time of day and lighting
The time of day and lighting can greatly affect your sketch. Early morning or late afternoon often provides the best light, with long shadows and softer colors. Midday light can be harsh and make details harder to see. Always consider how the light will change while you are sketching.
Sketching Your Scene
-
Starting with a Basic Sketch
Begin by drawing simple shapes. Use light lines to outline buildings, streets, and other main elements. This helps you get the proportions right.
For example, if you are sketching a street, start with rectangles for buildings and lines for the street. Keep it simple!
-
Adding Details and Textures
Next, add details to your sketch. Look at windows, doors, and signs. Draw these elements carefully.
Textures make your sketch come alive. Add bricks, wood grains, and other textures. Use short lines and dots to show these details.
Tip: Observe the scene closely. Notice how light and shadow create different textures.
-
Finishing Touches
Finally, add the finishing touches. Darken the lines you want to keep. Erase any extra lines.
Consider adding shading to show depth. Use hatching or cross-hatching techniques for this.
“A sketch is a glimpse into the artist’s mind.” – Unknown
| Step | Action | Example |
|---|---|---|
| 1 | Basic Sketch | Draw simple shapes like rectangles and lines |
| 2 | Details and Textures | Add windows, doors, and textures like bricks |
| 3 | Finishing Touches | Darken lines, erase extras, and add shading |
Street Sketching Ideas
-
Sketching Cafes and Restaurants
Cafes and restaurants are great places to start your street sketching journey. They are full of life and detail. You can draw people enjoying their meals, waiters serving food, and the unique decor of each place. Look for interesting features like vintage signs, cozy seating areas, and colorful dishes.
Tip: Try to capture the atmosphere. Is it a busy cafe or a quiet restaurant? Use your sketches to tell a story.
-
Sketching Markets and Shops
Markets and shops offer a vibrant and dynamic environment for sketching. You can draw stalls filled with fruits, vegetables, and other goods. Notice the hustle and bustle of people shopping, the variety of products, and the different textures and colors.
Example: Sketch a flower stall with bright blooms or a bakery with delicious pastries. Pay attention to the details that make each shop unique.
-
Sketching Parks and Public Spaces
Parks and public spaces are perfect for capturing nature and people together. You can draw trees, benches, playgrounds, and people walking their dogs or having picnics. These places are often peaceful and offer a variety of scenes to sketch.
Data: Did you know that spending time in nature can improve your mood and creativity? Sketching in parks can be a relaxing and inspiring activity.
Urban Sketching for Beginners
Getting Started
-
Choosing your first sketching supplies
Starting with the right tools is important. You don’t need expensive supplies. Begin with a simple sketchbook, a few pencils, and an eraser. Many artists prefer using fine-liner pens for their sketches. Watercolor sets can add color to your drawings.
Supply Recommended Sketchbook 5.5 x 8.5 inches Pencils HB, 2B Fine-liner Pens 0.3 mm, 0.5 mm Watercolor Set Basic 12-color set -
Understanding the basics of sketching
Before you start, it’s good to learn some basic techniques. Practice drawing simple shapes like circles, squares, and triangles. These shapes are the building blocks of more complex drawings. Remember, sketching is about capturing the essence of a scene, not every detail.
“Sketching is a way of seeing the world with fresh eyes.” – Unknown
-
Creating your first sketch
Find a comfortable spot in the city. Look for interesting buildings, people, or scenes. Start by drawing the basic shapes you see. Add details slowly. Don’t worry about making mistakes. Every sketch is a learning experience.
Tip: Use light pencil strokes to outline your sketch. You can go over it with a pen later.
Improving Your Skills
-
Practicing regularly:
To get better at urban sketching, practice is key. Try to sketch every day, even if it’s just for a few minutes. This helps you get used to drawing quickly and capturing scenes on the go. Remember, the more you practice, the better you will become.
-
Learning from other urban sketchers:
Watching other sketchers can teach you new techniques. Join local sketching groups or online communities. You can see how others approach their work and pick up tips. Sometimes, seeing how someone else solves a problem can help you improve your own skills.
-
Challenging yourself with more complex scenes:
Start with simple sketches, but don’t be afraid to try more complex scenes. This can include busy streets, detailed buildings, or crowded markets. Challenging yourself helps you learn and grow as an artist. Remember, it’s okay if your first attempts aren’t perfect. The goal is to keep improving.
Urban Street Art Drawing
- Understanding the history of street art
Street art has a rich history. It began in the 1960s in cities like New York. Artists used walls and buildings as their canvas. They wanted to express their ideas and feelings. Over time, street art became popular worldwide.
Today, street art is seen in many cities. It can be colorful murals or simple graffiti. Some famous street artists include Banksy and Shepard Fairey. Their works are known and loved by many people.
- How to incorporate street art elements into your sketches
Adding street art elements to your sketches can be fun. Start by looking at different street art styles. Notice the bold colors and shapes. Try to use these in your drawings.
Here are some tips:
- Use bright colors to make your sketches pop.
- Incorporate graffiti-style text.
- Draw large, bold shapes.
- Add details like spray paint drips.
Practice these techniques to improve your skills. Soon, your sketches will look like real street art!
- Examples of successful urban street art sketches
Looking at examples can inspire you. Here are some successful urban street art sketches:
| Artist | Sketch Description |
|---|---|
| Jane Doe | A colorful mural of a cityscape with graffiti elements. |
| John Smith | A black and white sketch with bold lines and street art text. |
| Emily Brown | A sketch of a wall covered in vibrant street art designs. |
These artists used street art techniques in their sketches. They combined bold colors, shapes, and text. You can do the same in your drawings. Keep practicing and experimenting. Your urban street art sketches will improve over time.